It seems like just yesterday I was writing this same blog to reveal Ayla’s nursery and now, here we are, two years later and welcoming our second precious baby girl, Cora. I have had the wonderful opportunity to create several nurseries for many of my clients, but there is something so amazing about getting the chance to do it for my own girls. I get to add an extra layer of personalization and love to these special spaces with the added benefit of enjoying and spending so much time in these rooms for many years to come.
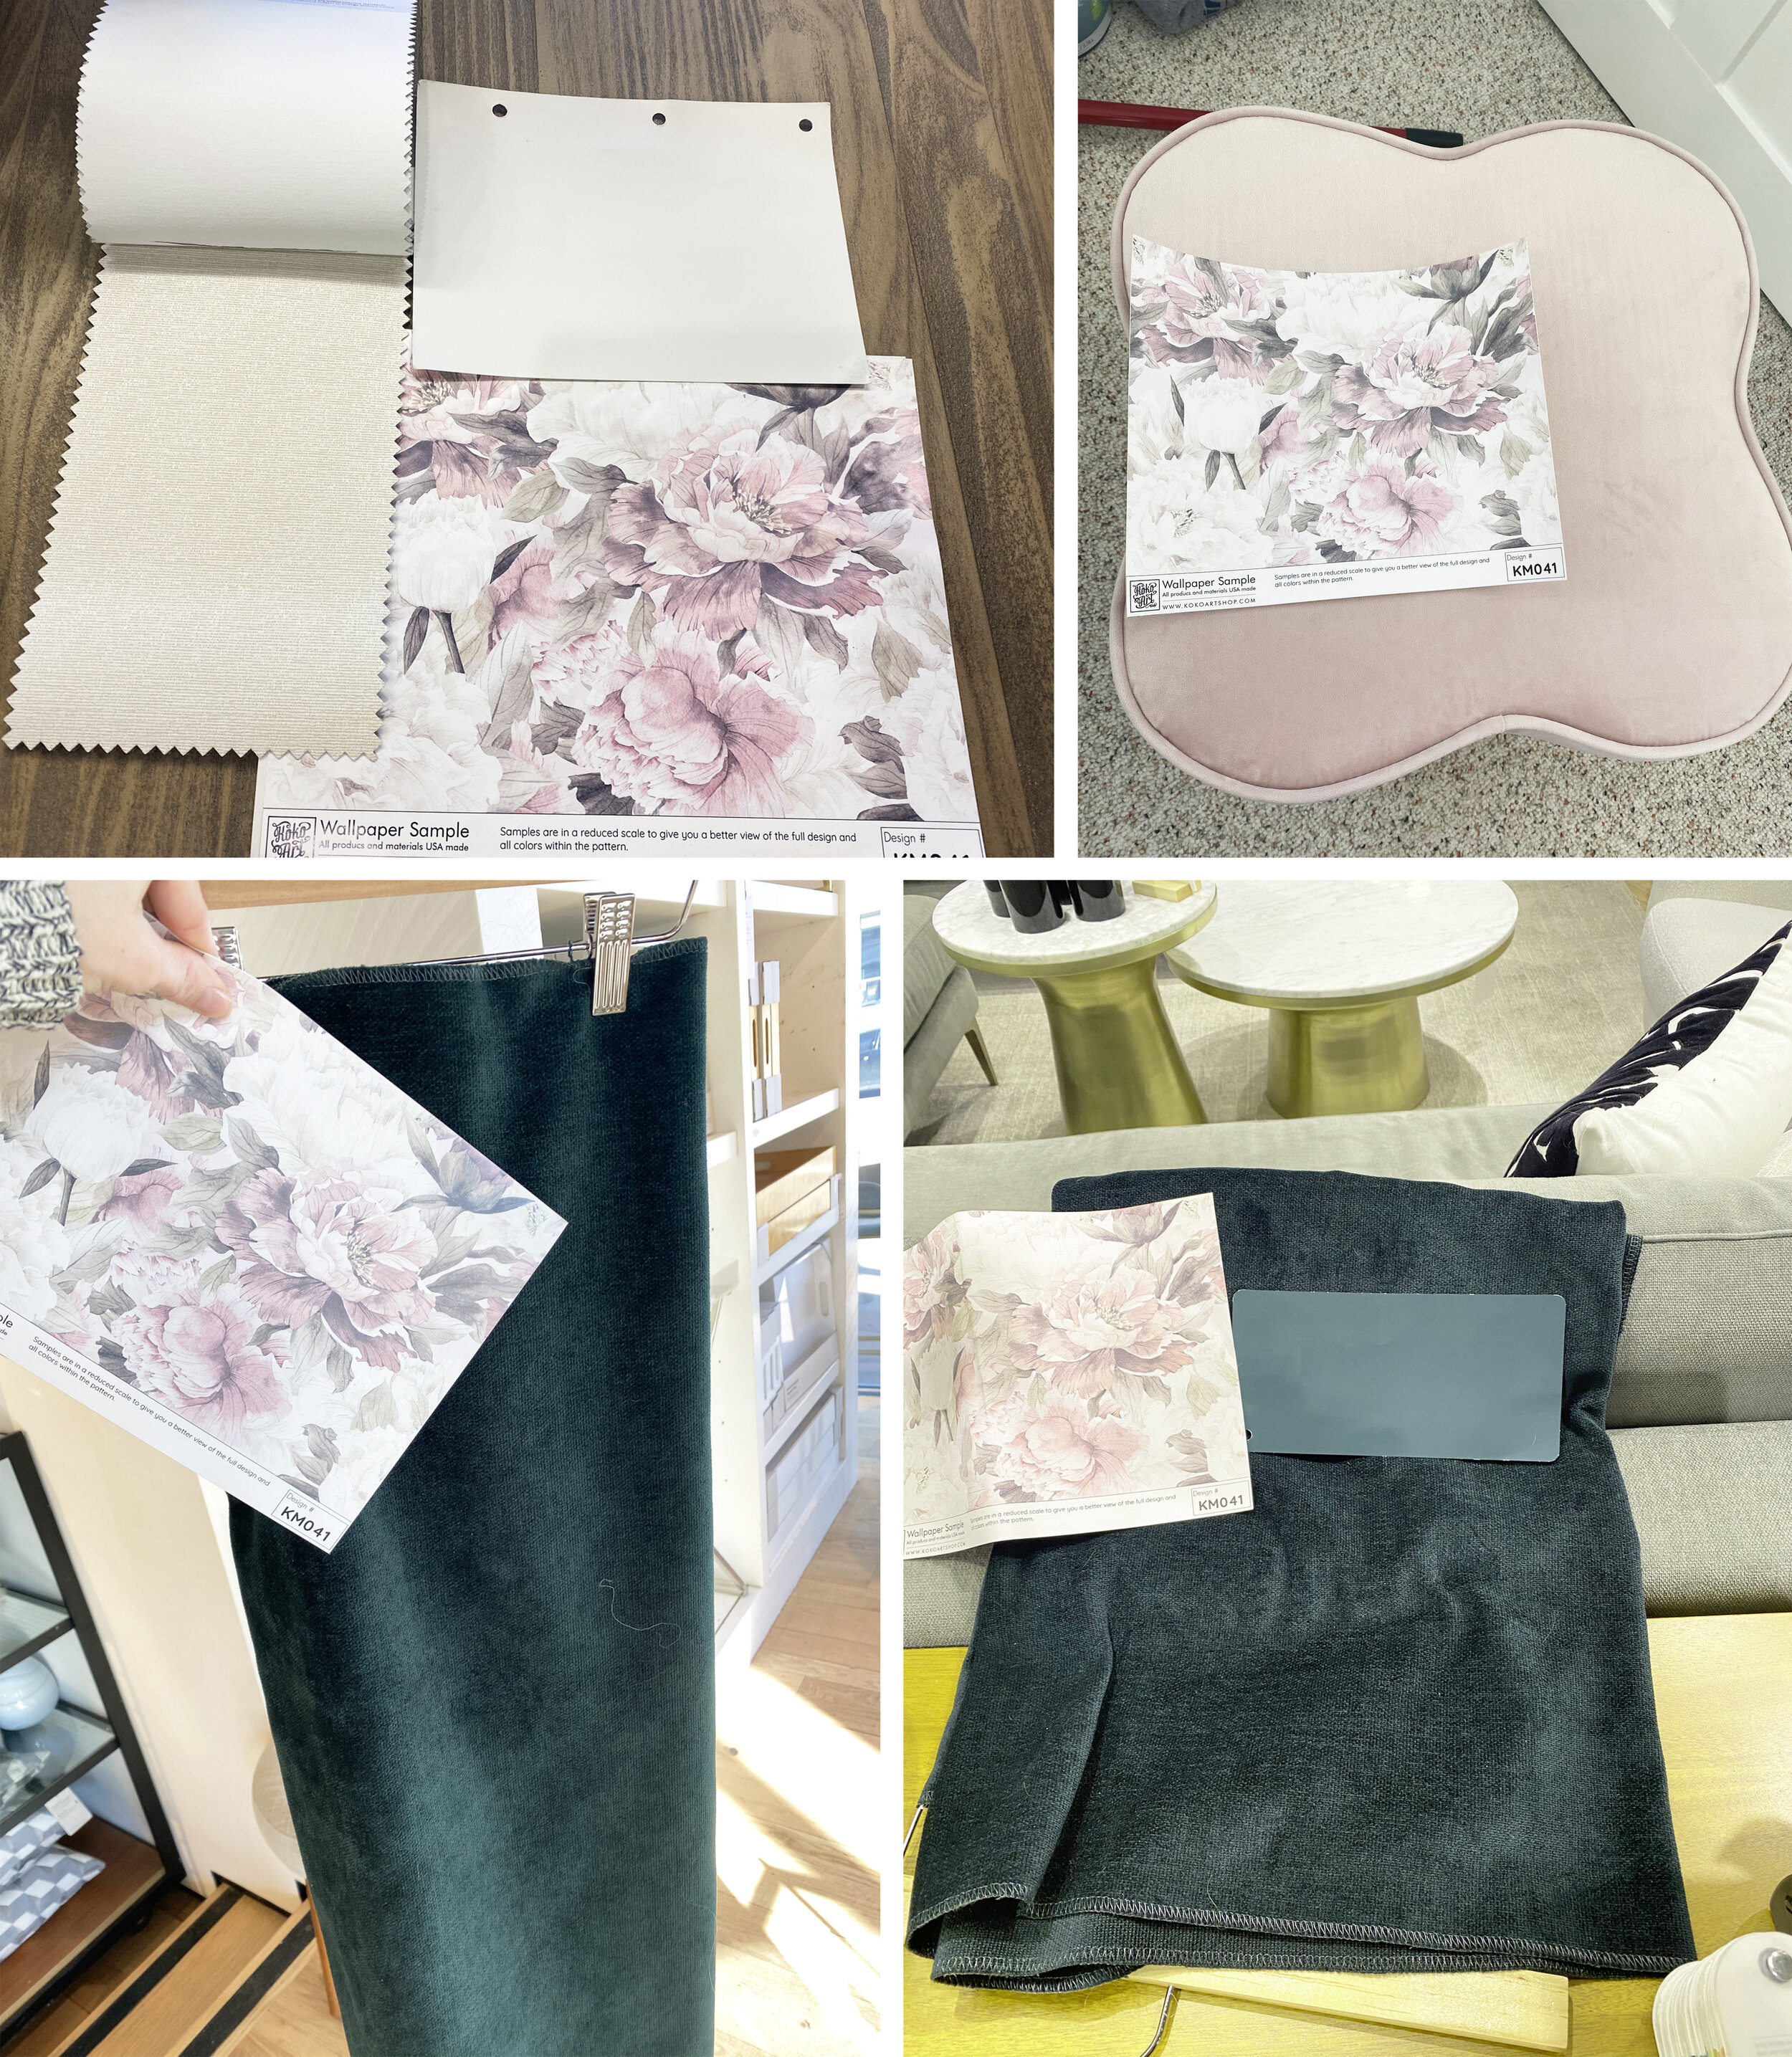
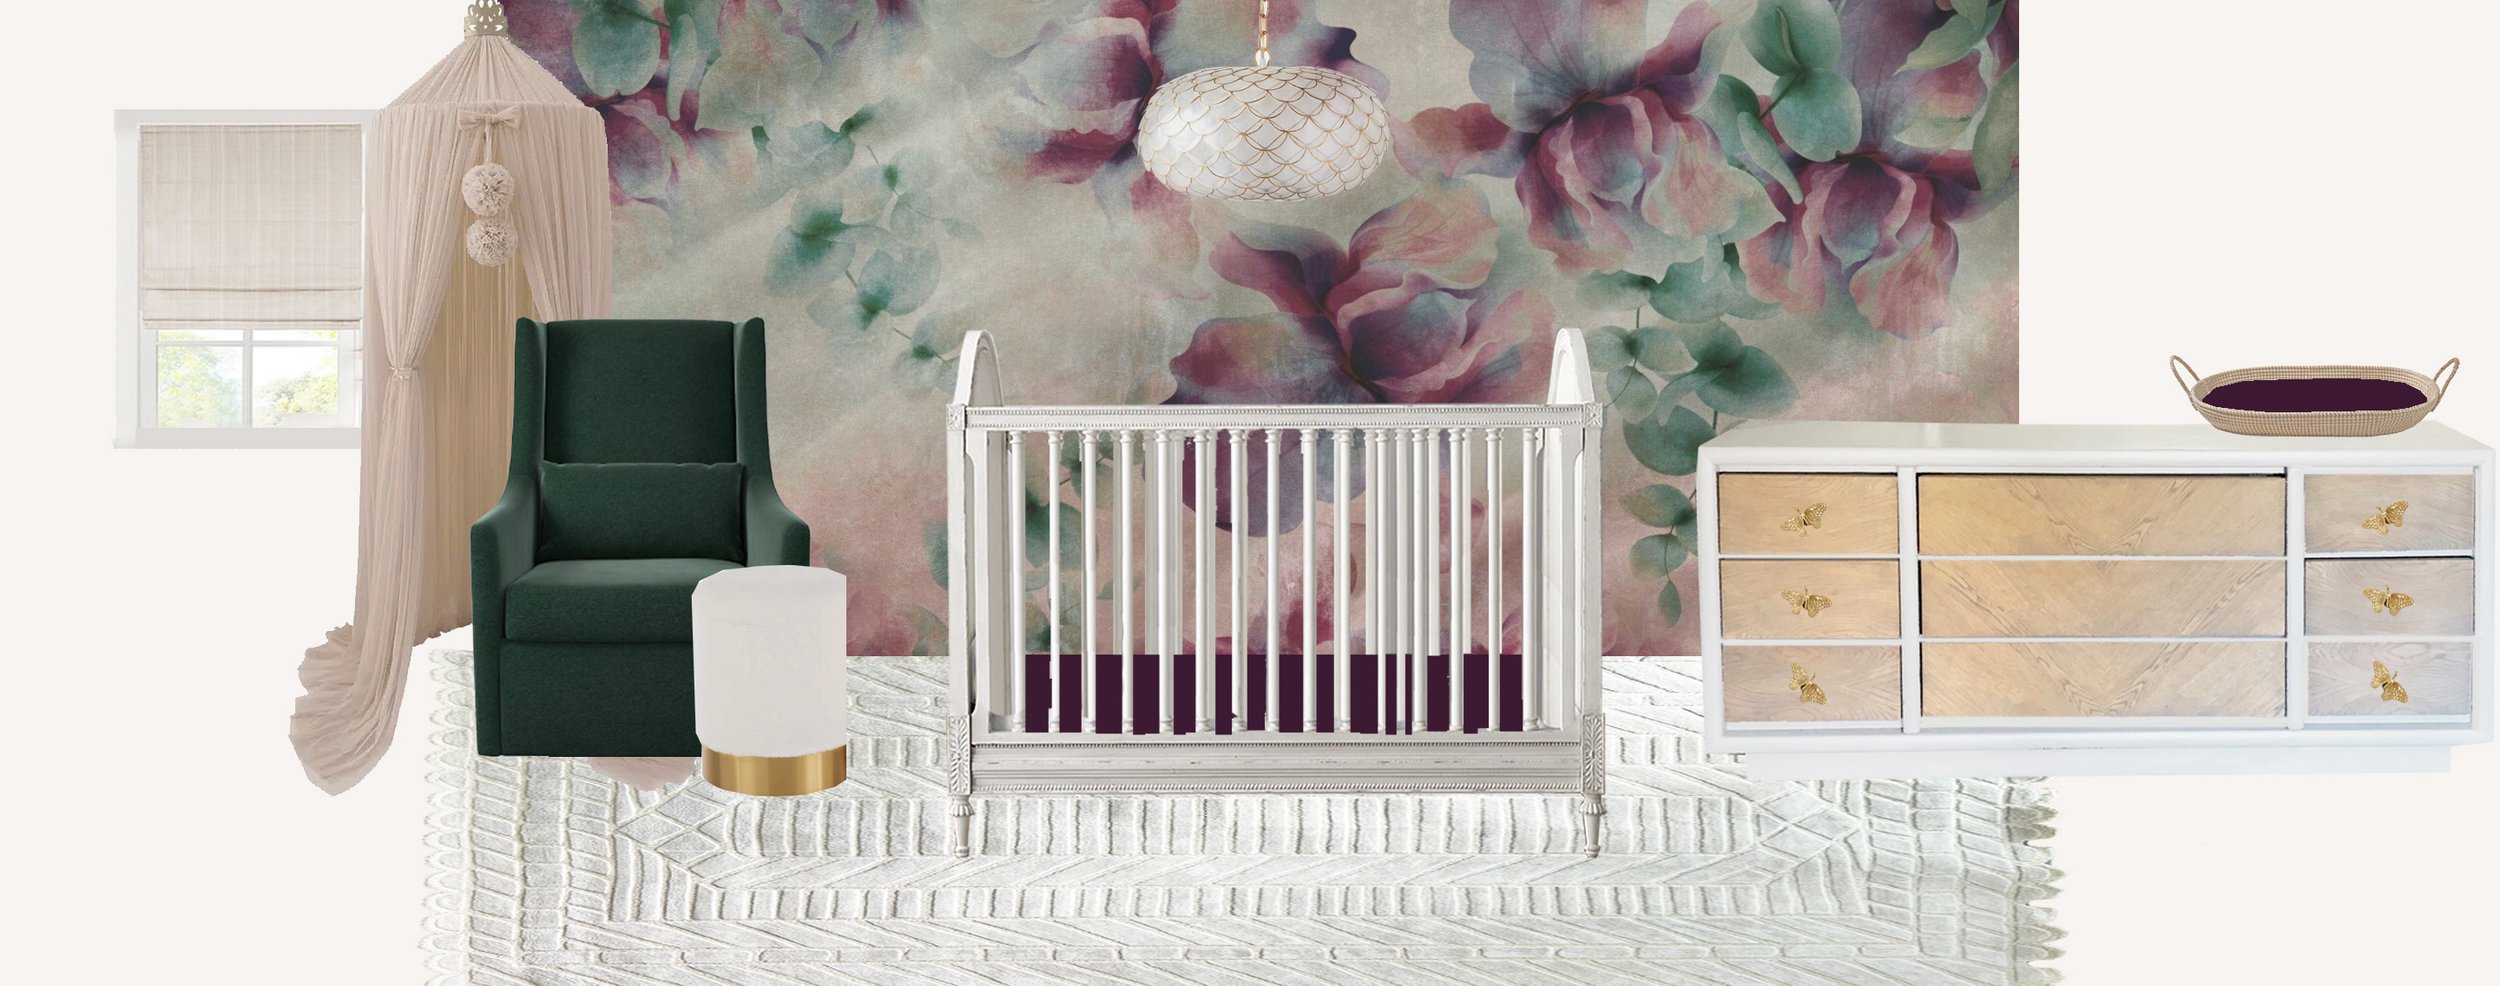
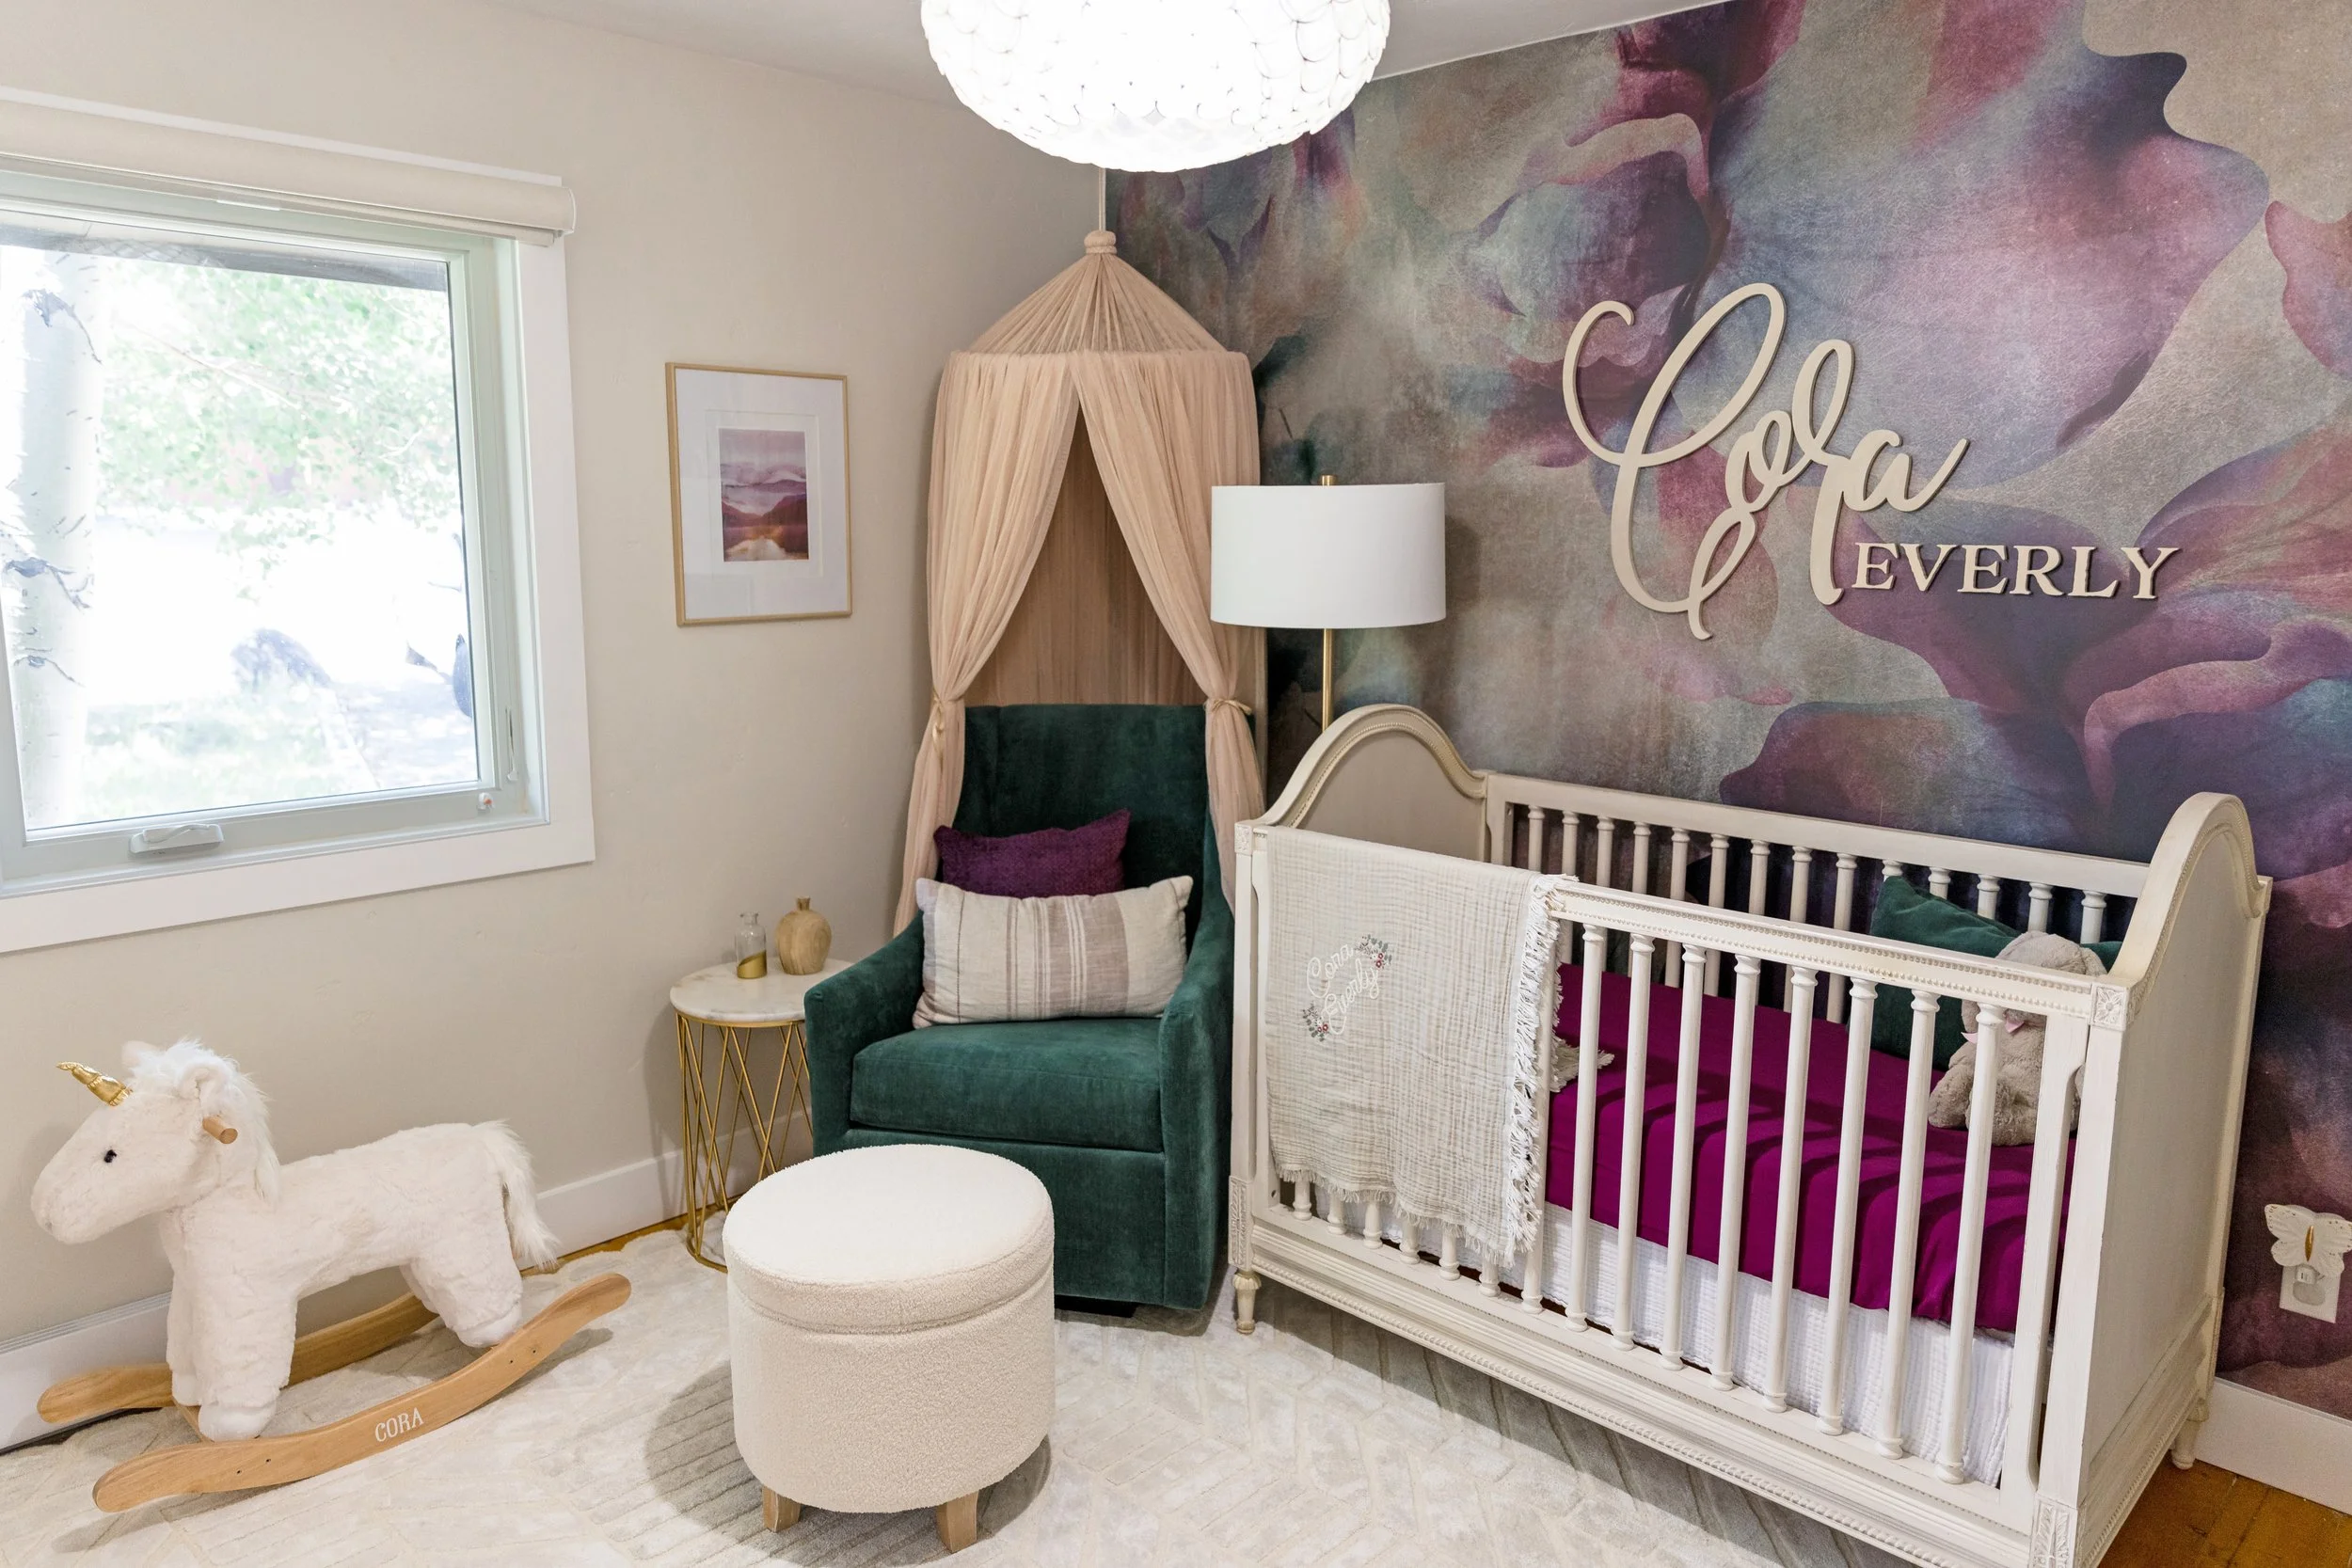
Cora’s room was a little easier to design because I already had a few elements I knew I wanted to incorporate into the design like Ayla’s beautiful crib, the emerald green chair, and a canopy I had ordered for Ayla and never used. This meant that my color palette to begin was green and champagne. I wanted a unique pop of color for Cora that had a moody feel to it. I tried a few different colors before deciding to go with a darker purple with some red and pink undertones to it. Once I found the feature wallpaper, I knew exactly how I wanted this room to look.
rendering
I always start off with a design lead, whether it is a wallpaper sample, a rug, a piece of artwork, or some other color or pattern because this material helps me to make every design choice for the rest of the space. With my wallpaper selection made and the larger elements decided on, we decided to update some of the existing elements of the room. We wanted to replace the baseboards with 5” white shaker style baseboards, re-texture the walls to a light skip-trowel texture to match the rest of the house, update the closets, paint, and give the bathroom a feminine facelift.

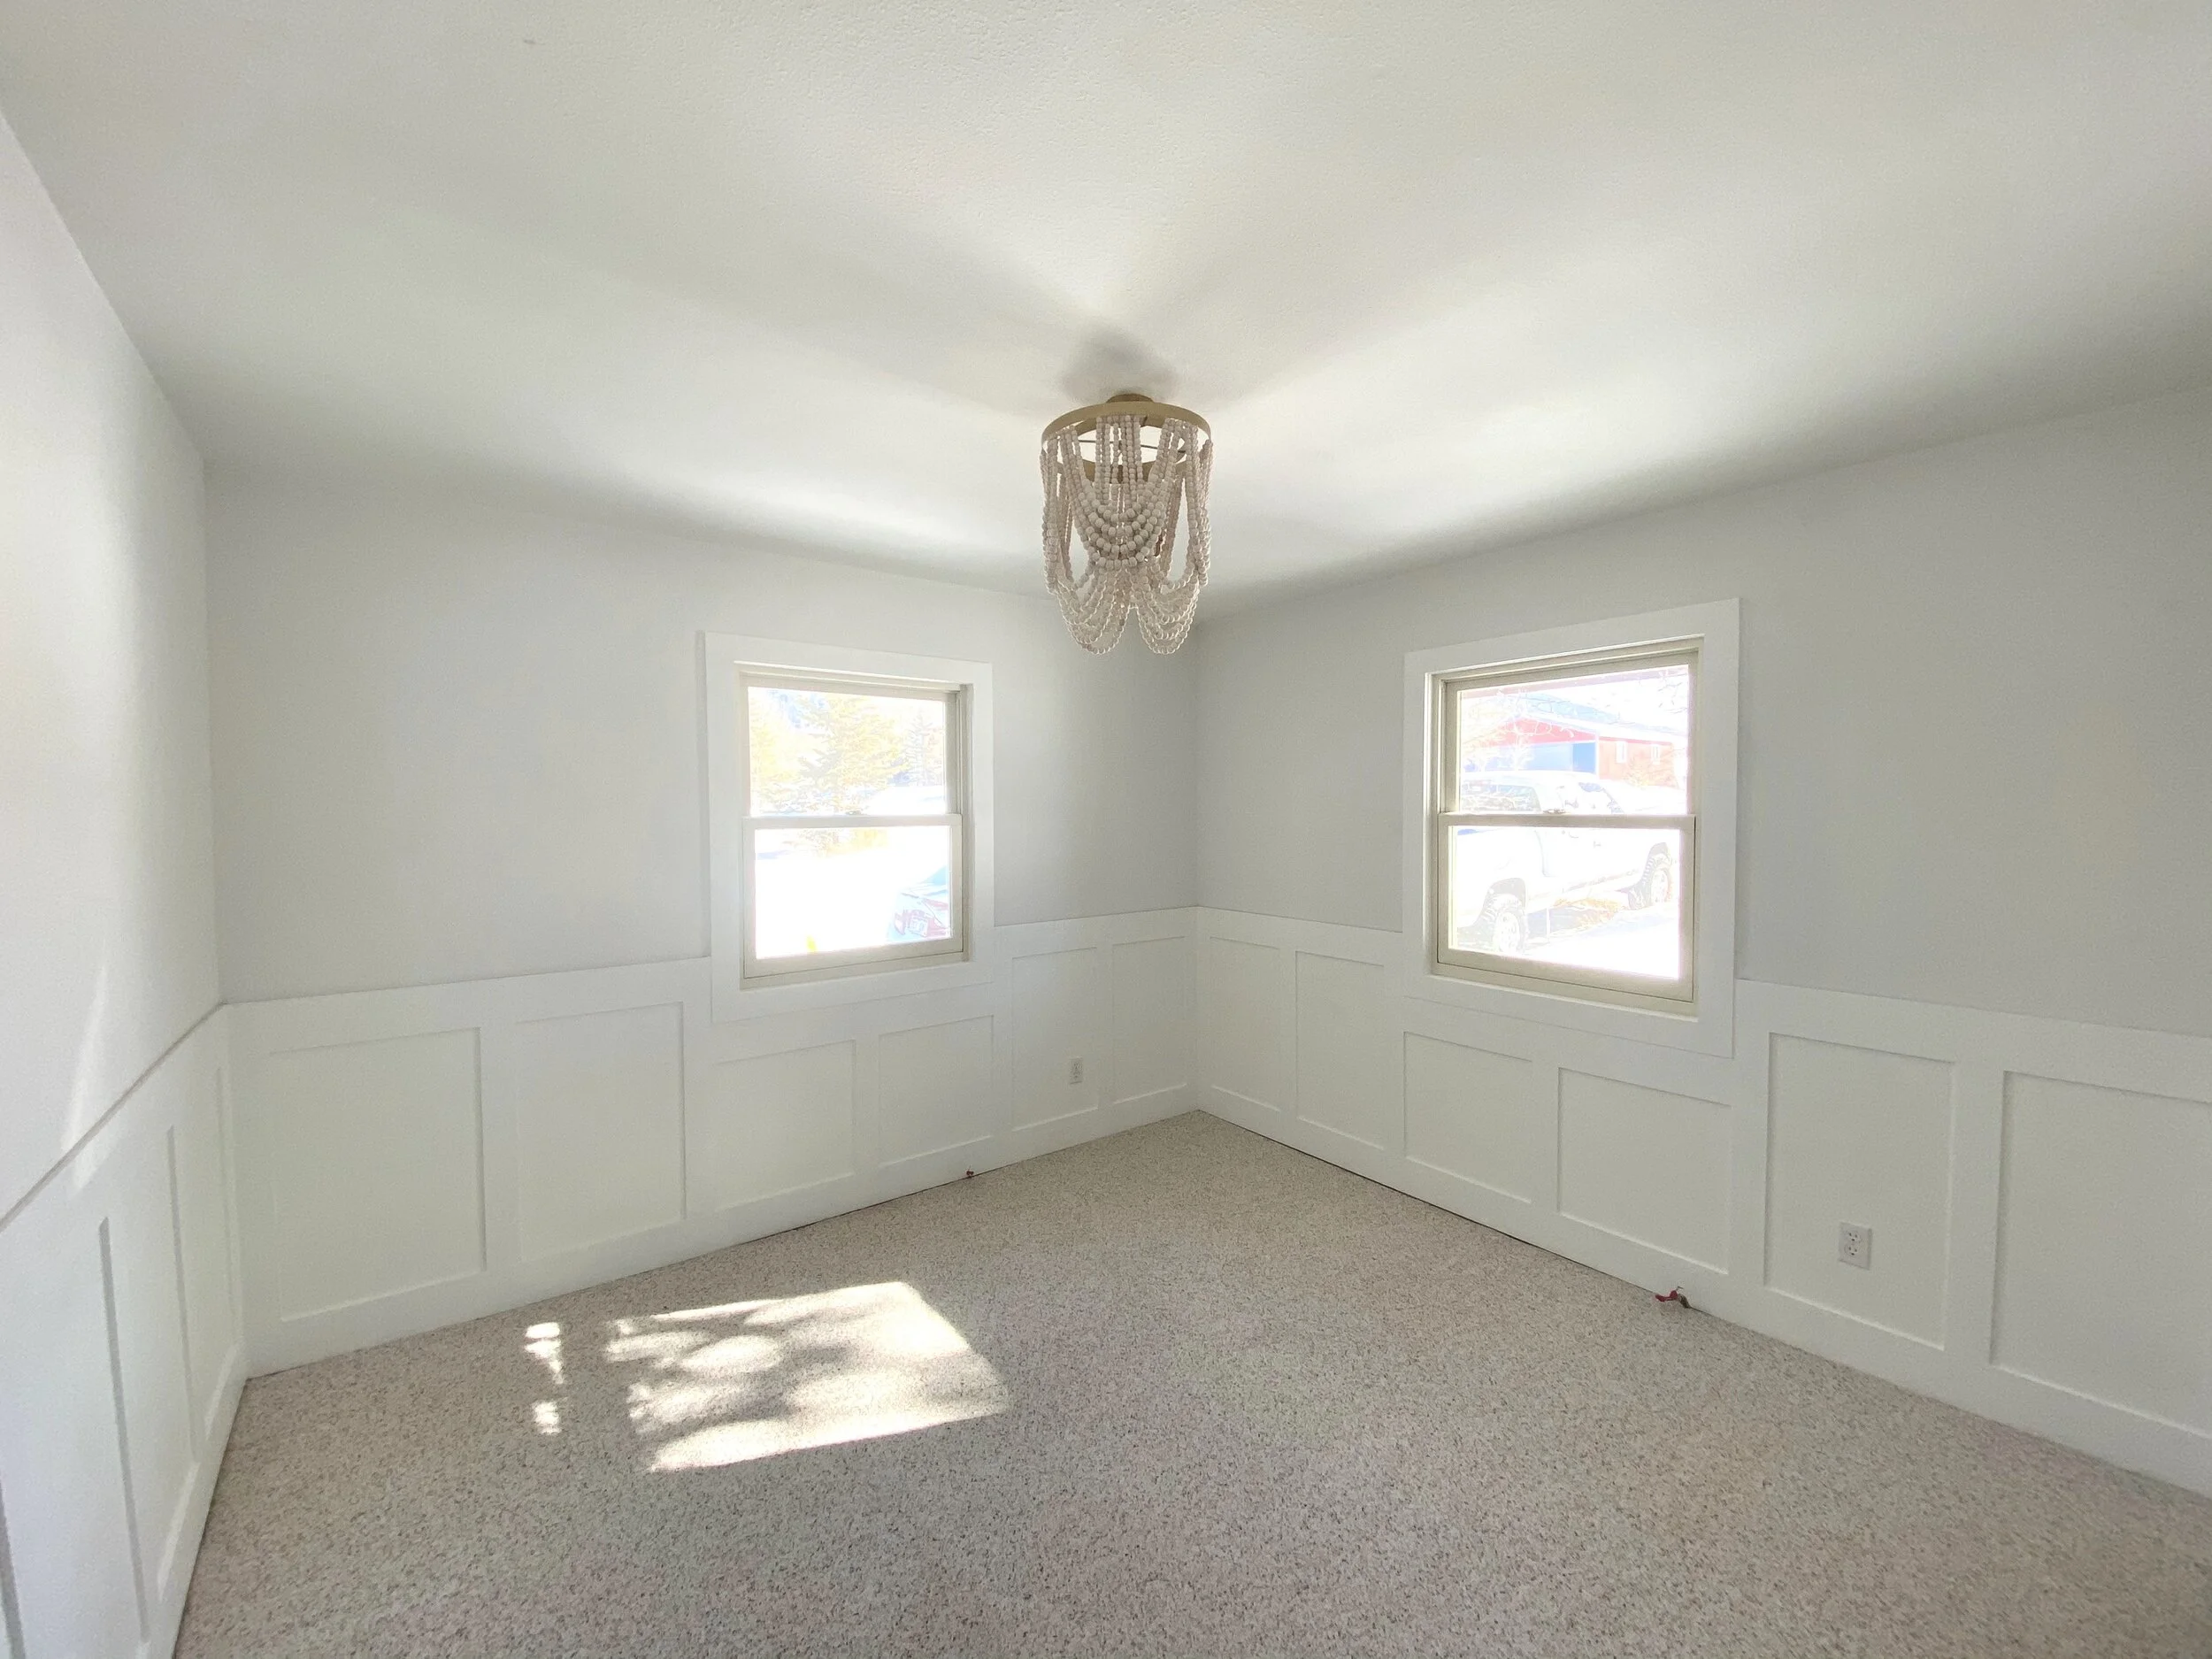
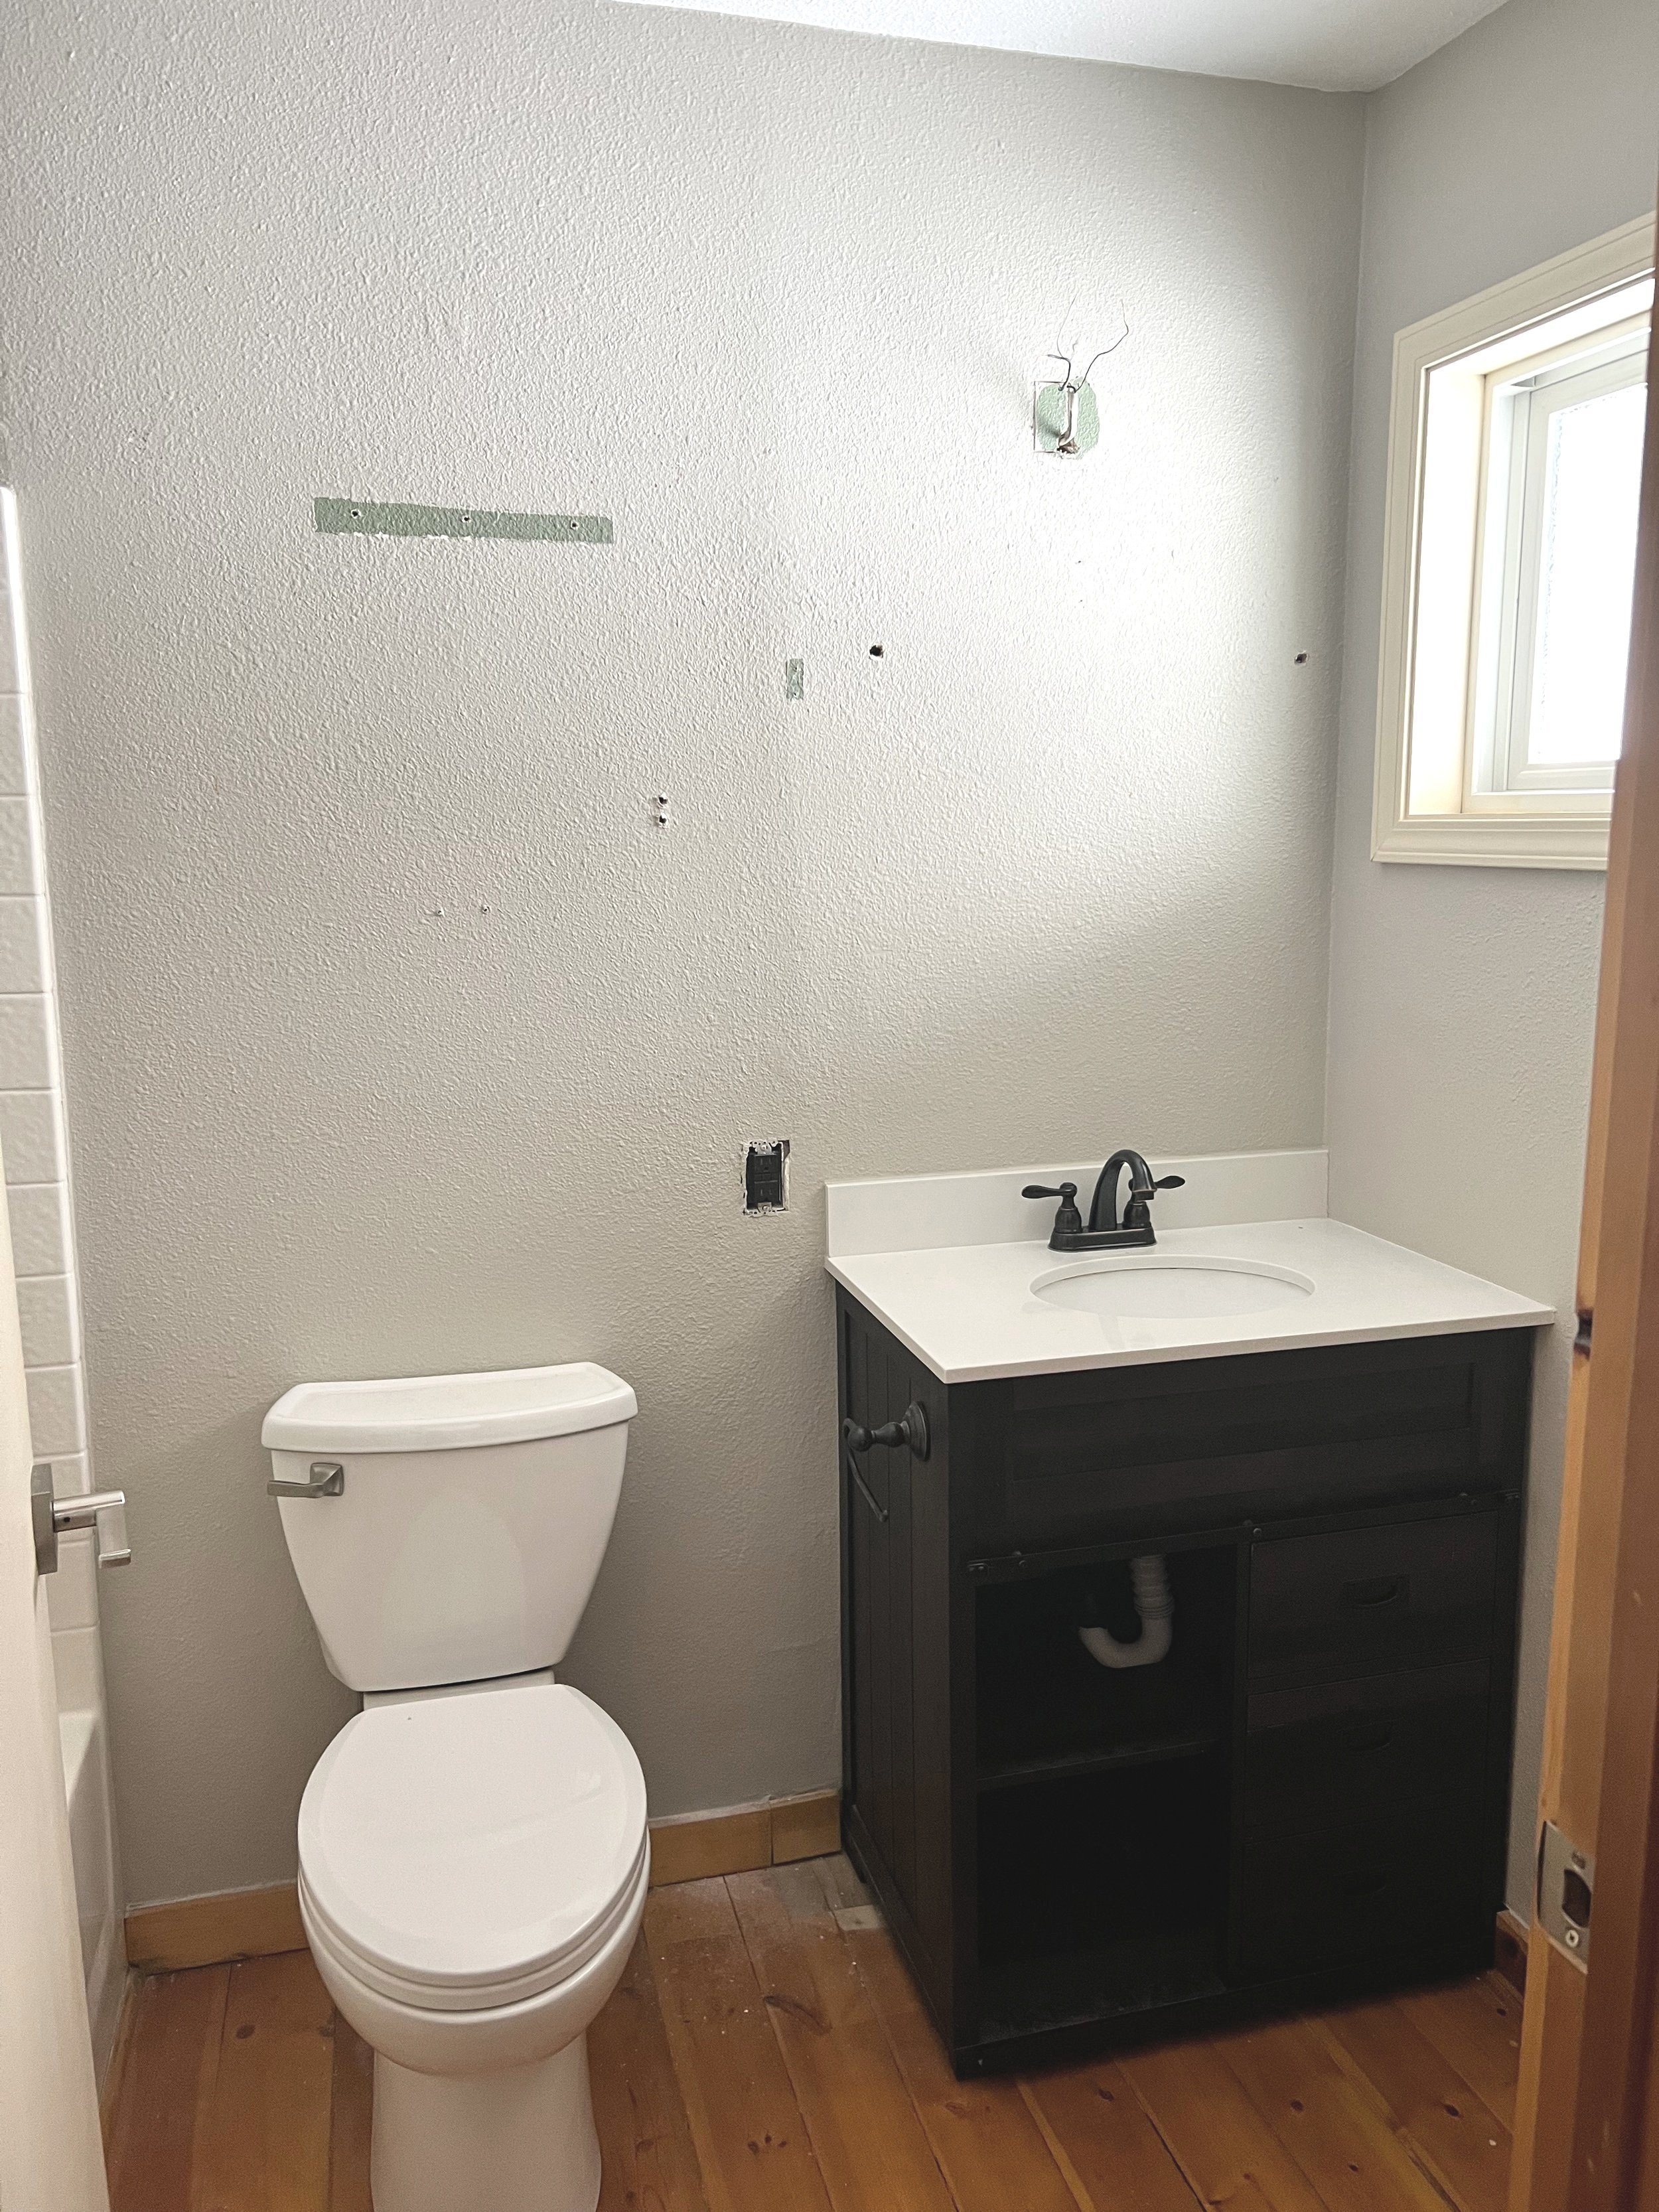
ROOM & BATHROOM BEFORE
We decided to hire some help with the larger construction projects like demo, texturing and paint to reduce the stress of finding time to do this ourselves with a toddler running around. As much as we were hoping this would be a smooth process, we all know it never is. Ryan and I tried to take on replacing floors and re-texuring other bedrooms at the same time and our house became pretty chaotic for a few weeks. We also had some issues with our handyman and ended up having to touch up the texture and paint in a lot of spaces ourselves. Once we got through that hurdle though, the fun began!
UNDER CONSTRUCTION
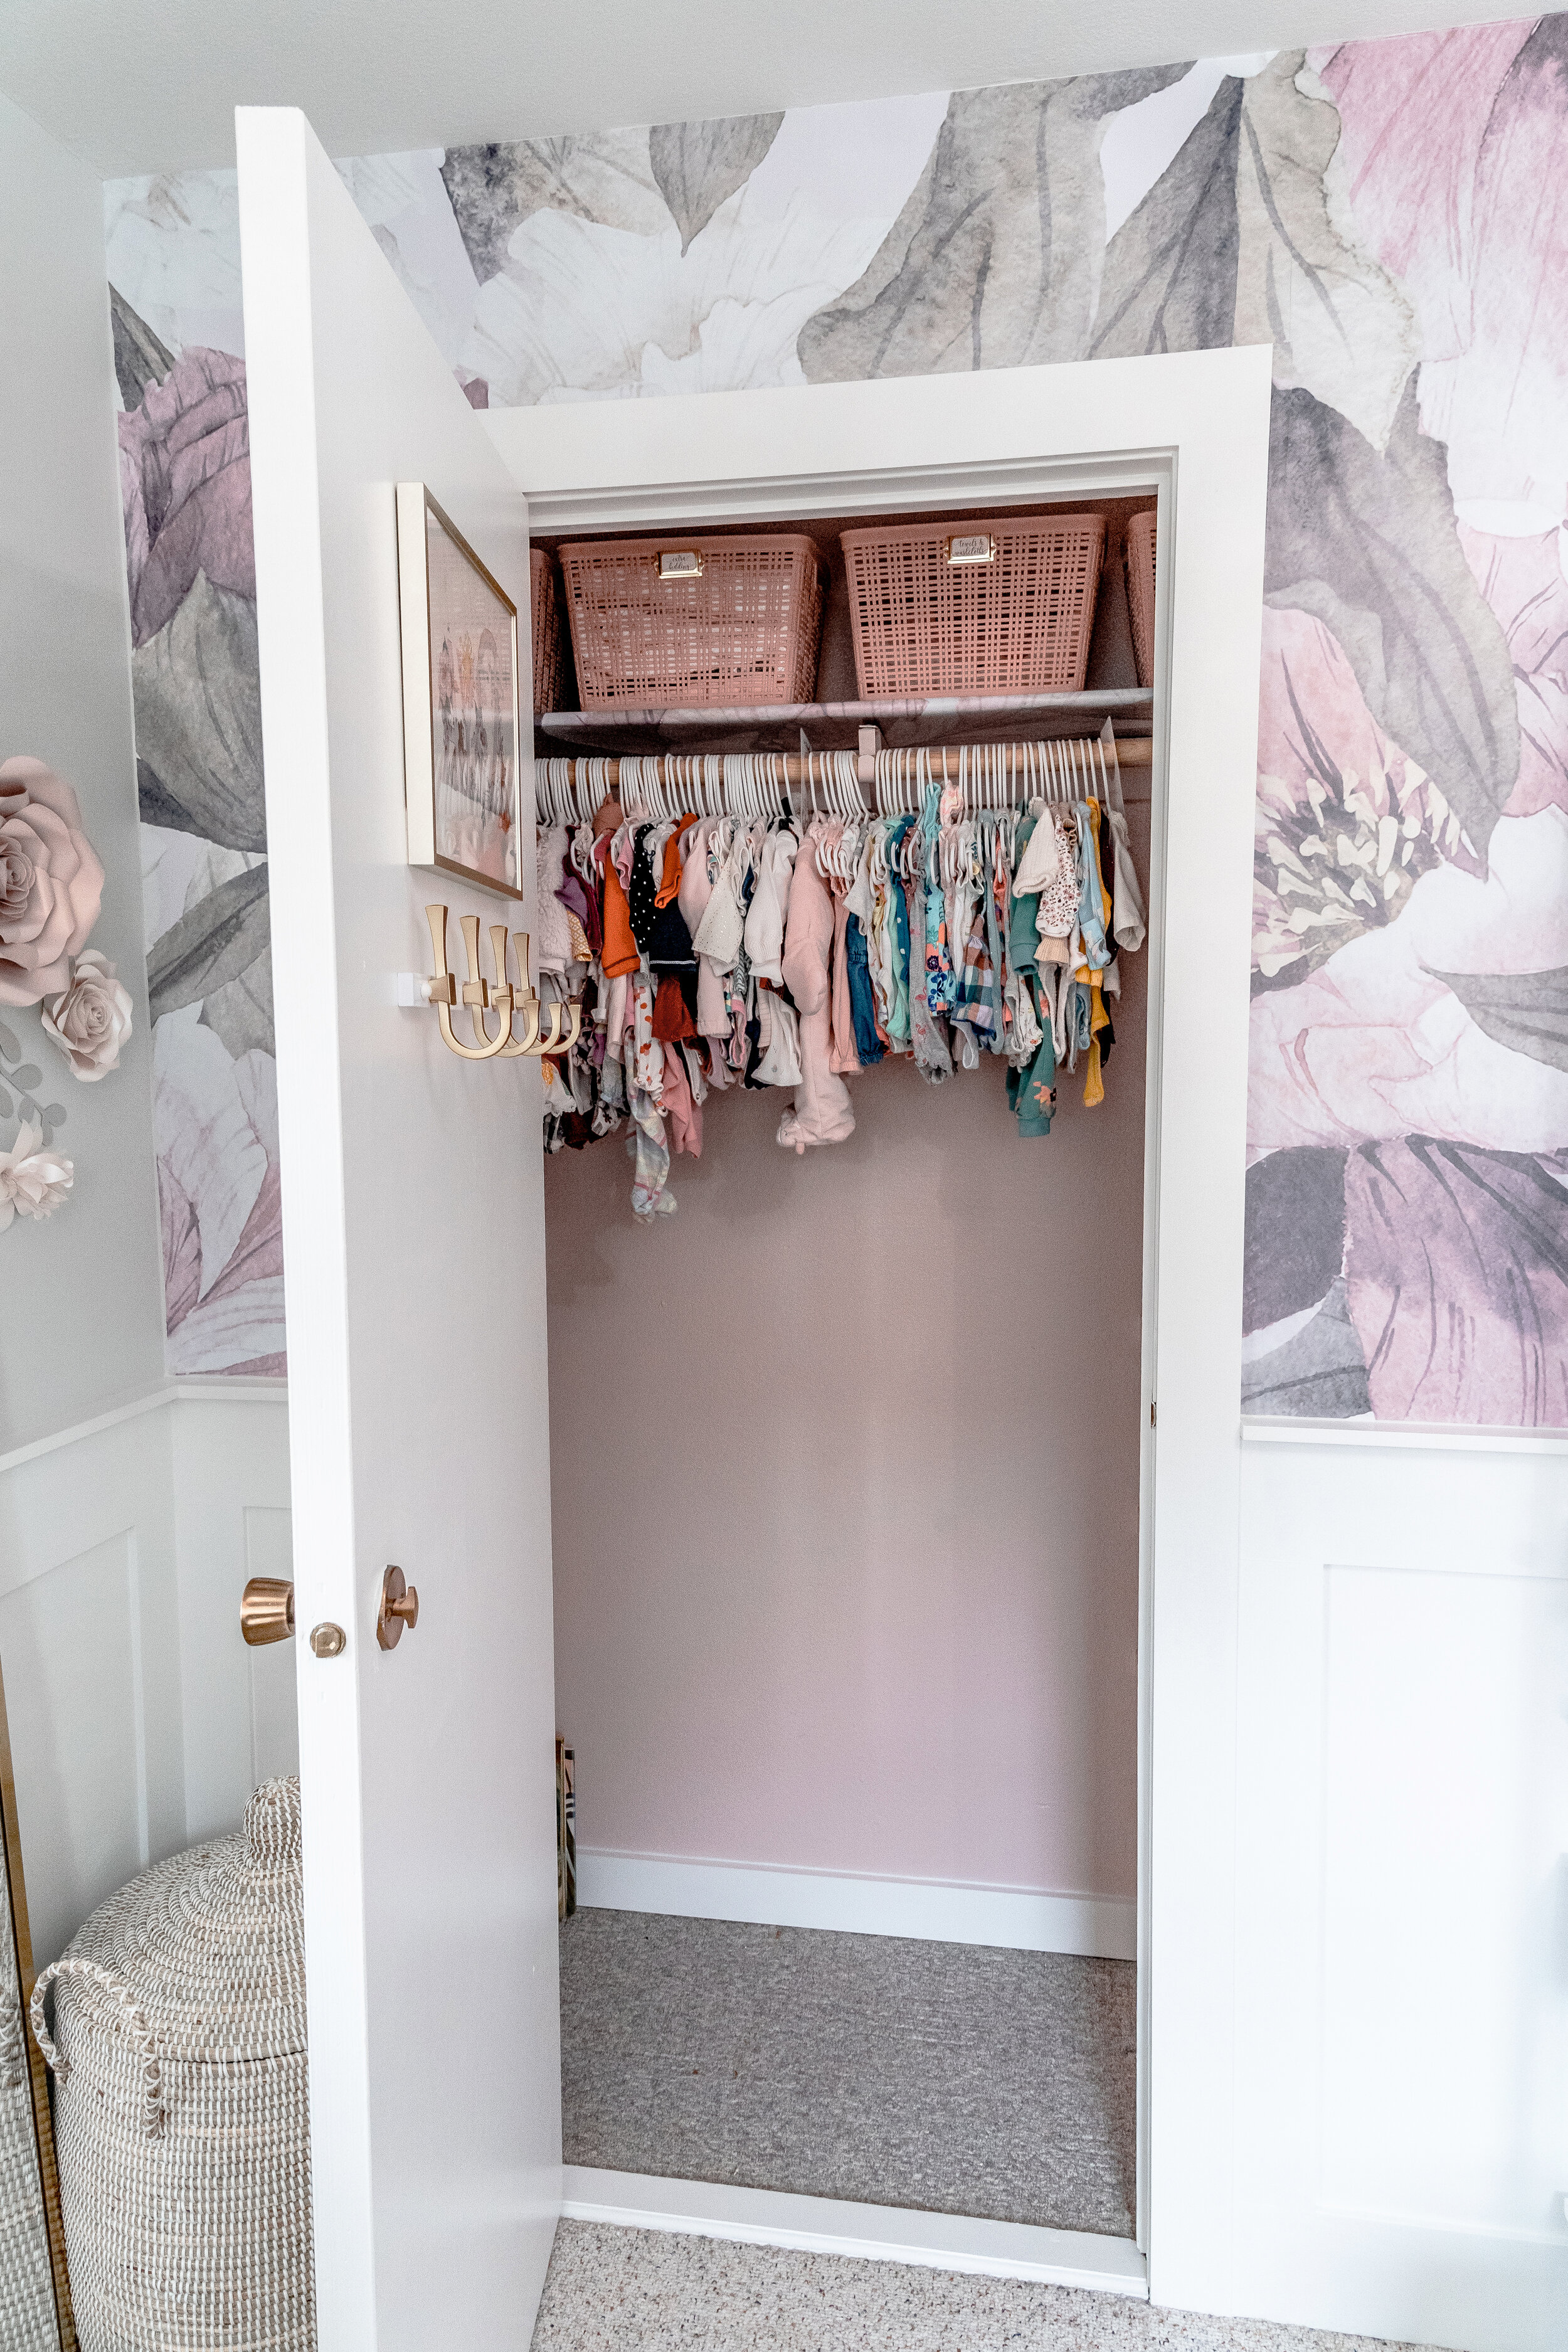
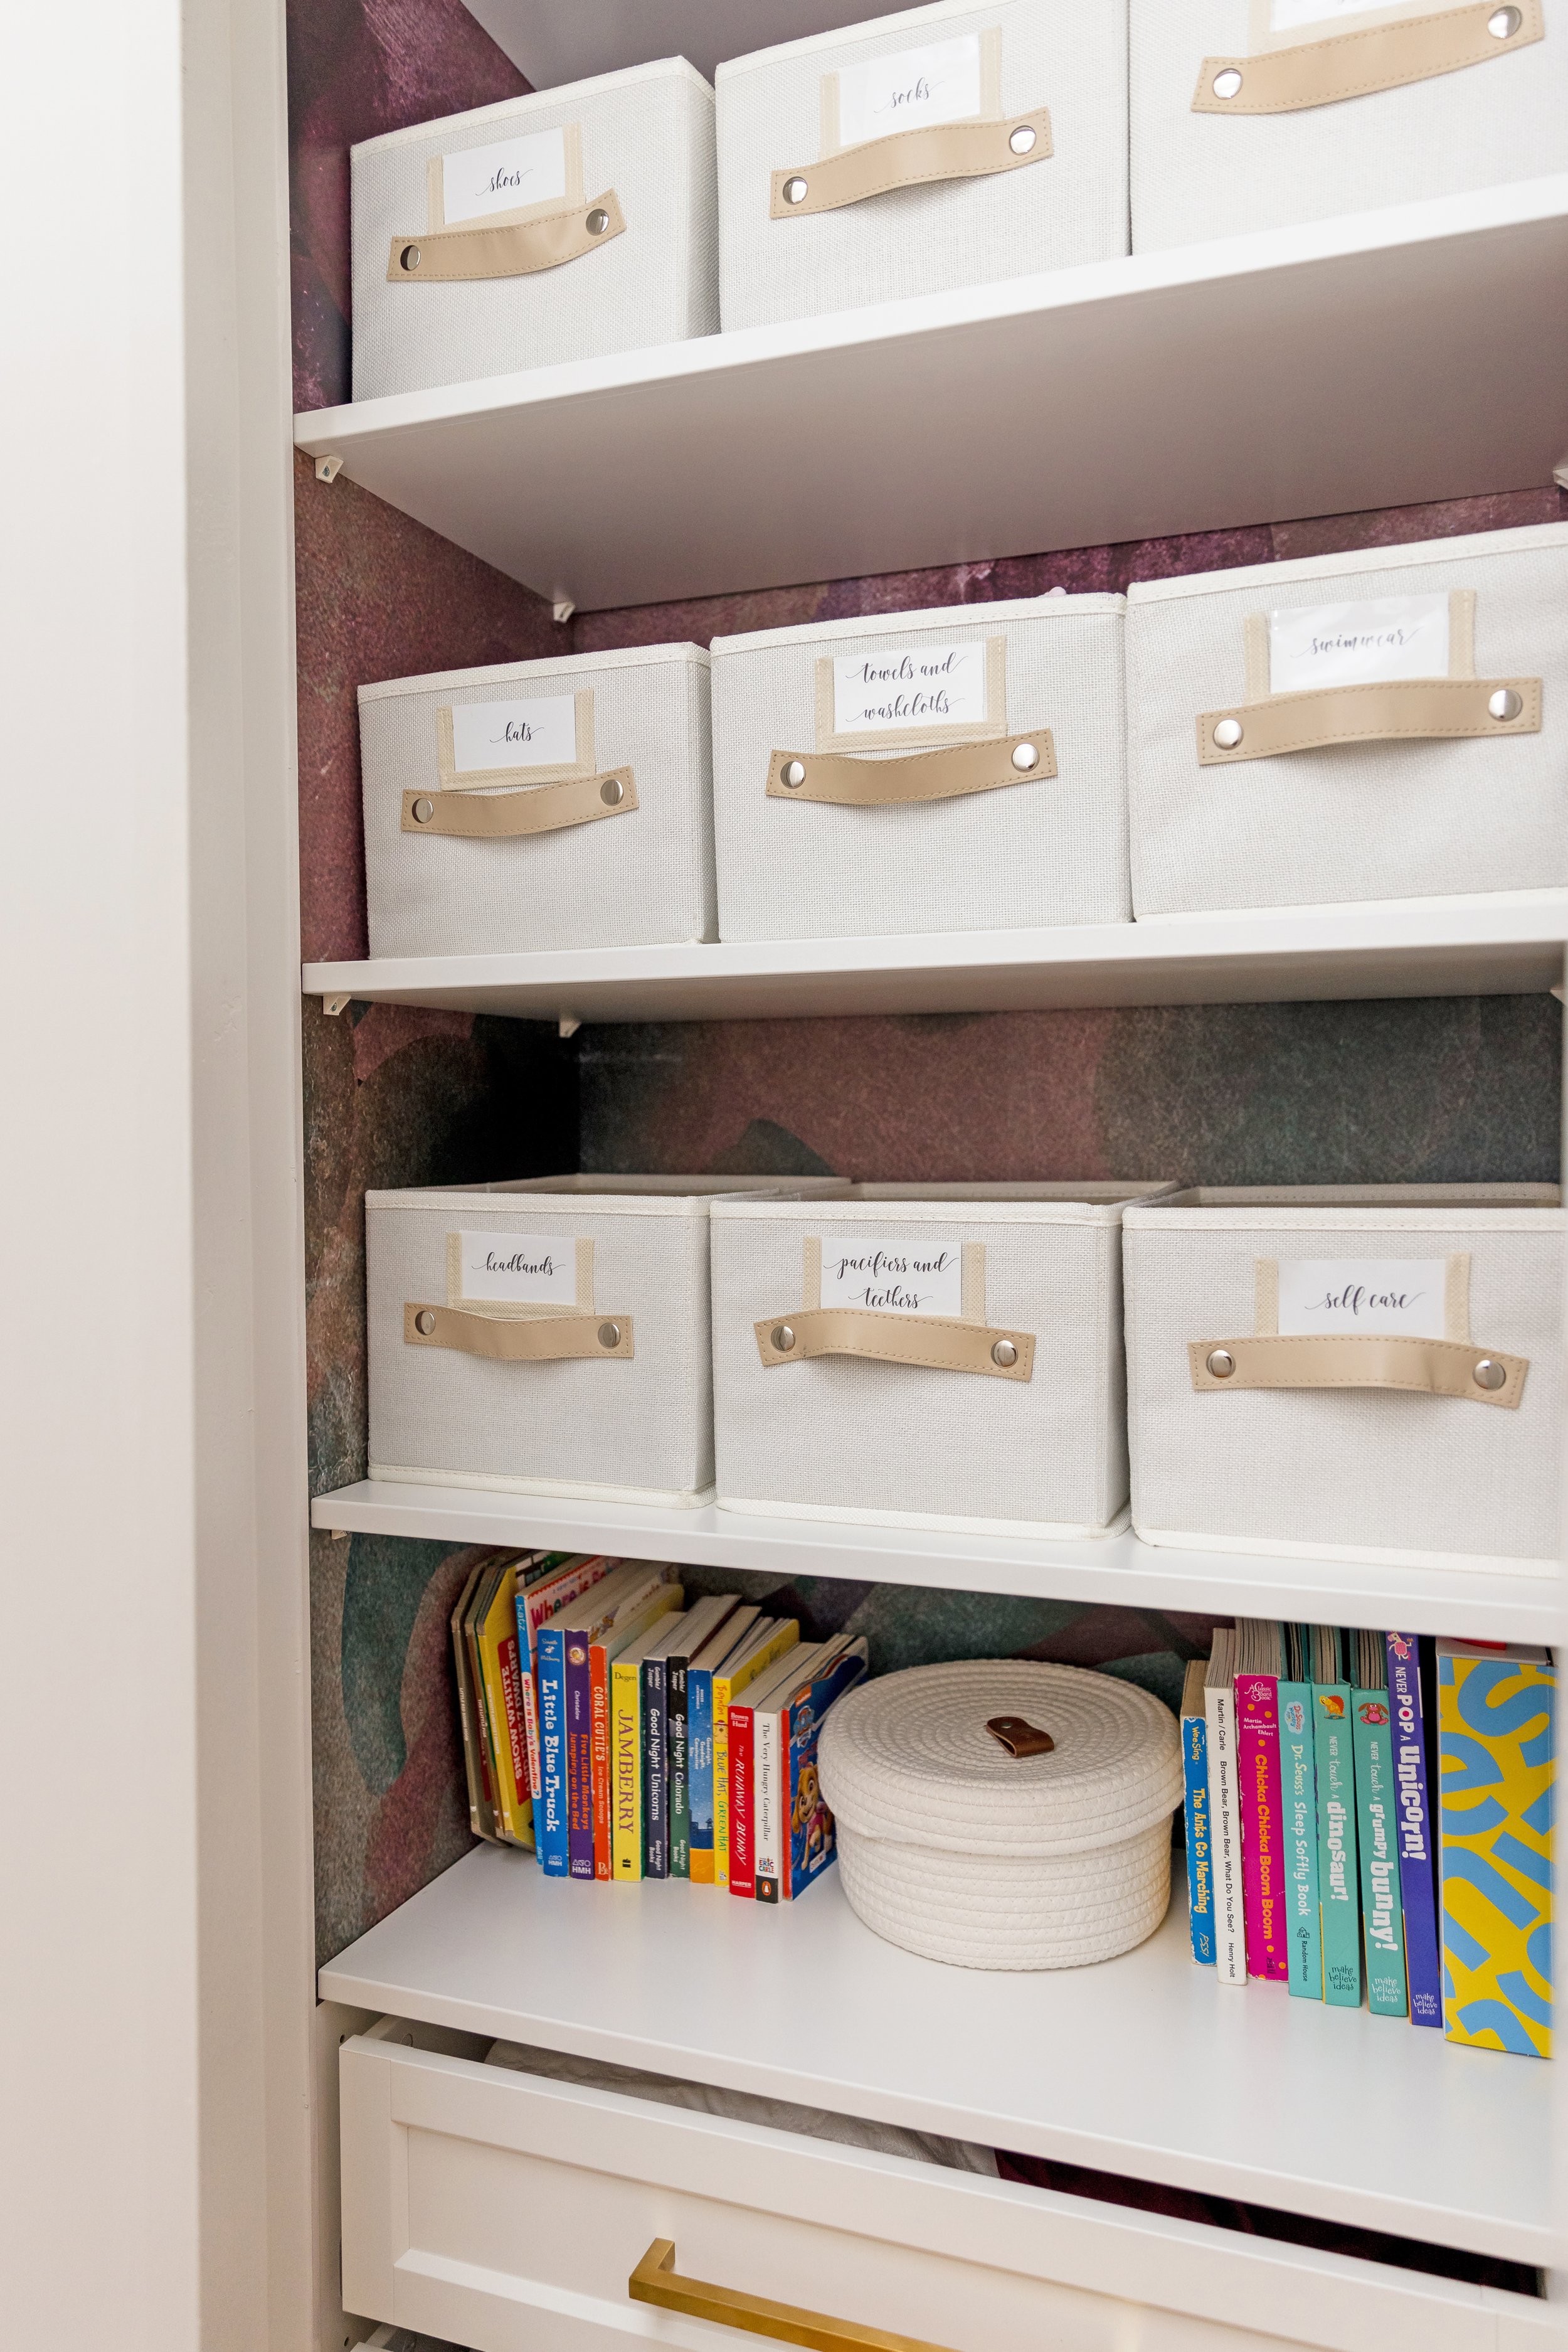
We started with the bathroom and closets to get those back to being functional as we still had company visiting us throughout the springtime. We replaced the vanity, sink, faucet, mirror, lighting, and shower plumbing. We had a ton of help from both of Cora’s Grandpas, her daddy and her Uncle Eddie to get these pieces installed. Cora’s grandpa or “Op” also put in all of the new trim work and helped get the bright white paint on all the doors and trim. Next up were the closets. The previous closets only had a single hanging rod and some wire shelving that was falling apart. We ended up inserting an IKEA unit in one closet that had open shelving for baskets and drawers to store bedding. I highly recommend considering the angle of the closet and the opening of the door before ordering a closet system that fits within an inch of the entire closet width. I blame pregnancy brain for this one but I was able to squeeze into the closet and build the system inside and make it work! Whew! We used some trim pieces to finish it off and I added in the leftover wallpaper to line the back of the shelves. We installed two shelves with rods in the other closet to double the storage because we knew we were going to need it with all of the clothes we have for our baby girl!
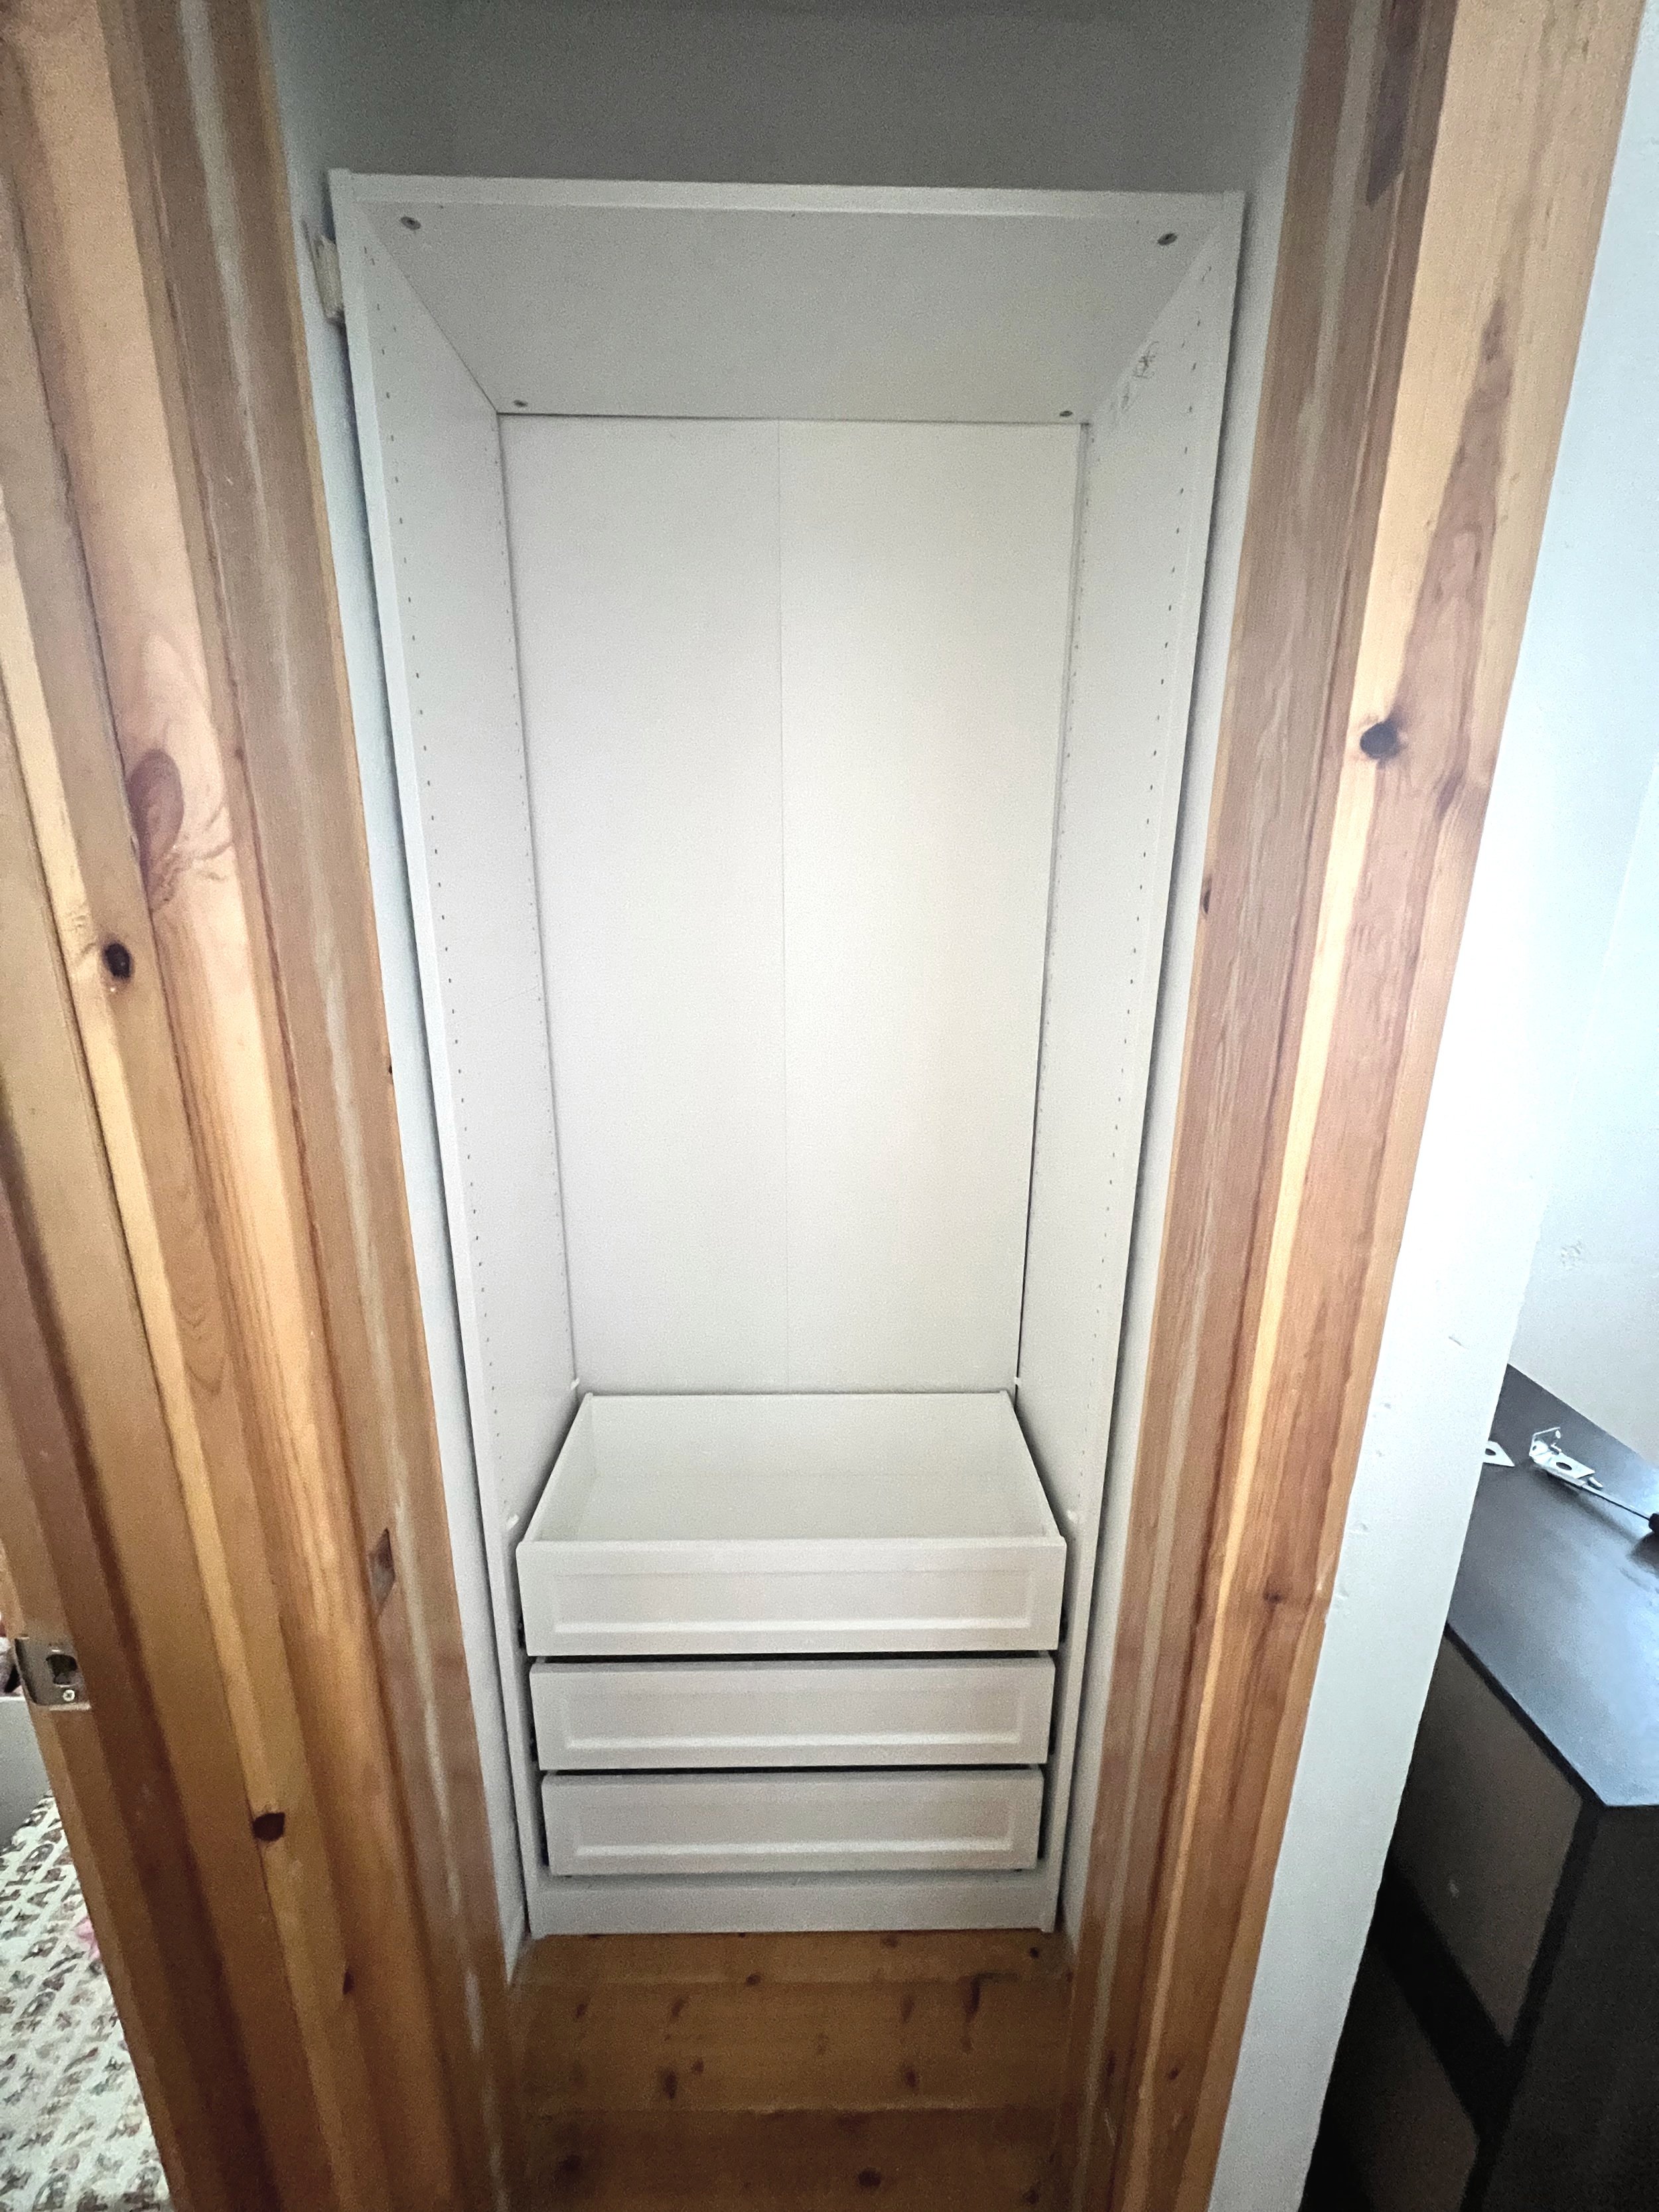
CLOSET SYSTEM

WALLPAPER & BASKETS
I also took on the huge project of the wallpaper installation. I will say, peel-and-stick wallpaper is not a huge time commitment project, but it is stressful if the seams don’t line up or if you end up with a lot of bubbles. Thankfully I had some experience in this area from Ayla’s room so it wasn’t too difficult, but if you can hire someone to install this for you- I would highly recommend it!

FEATURE WALL BEFORE

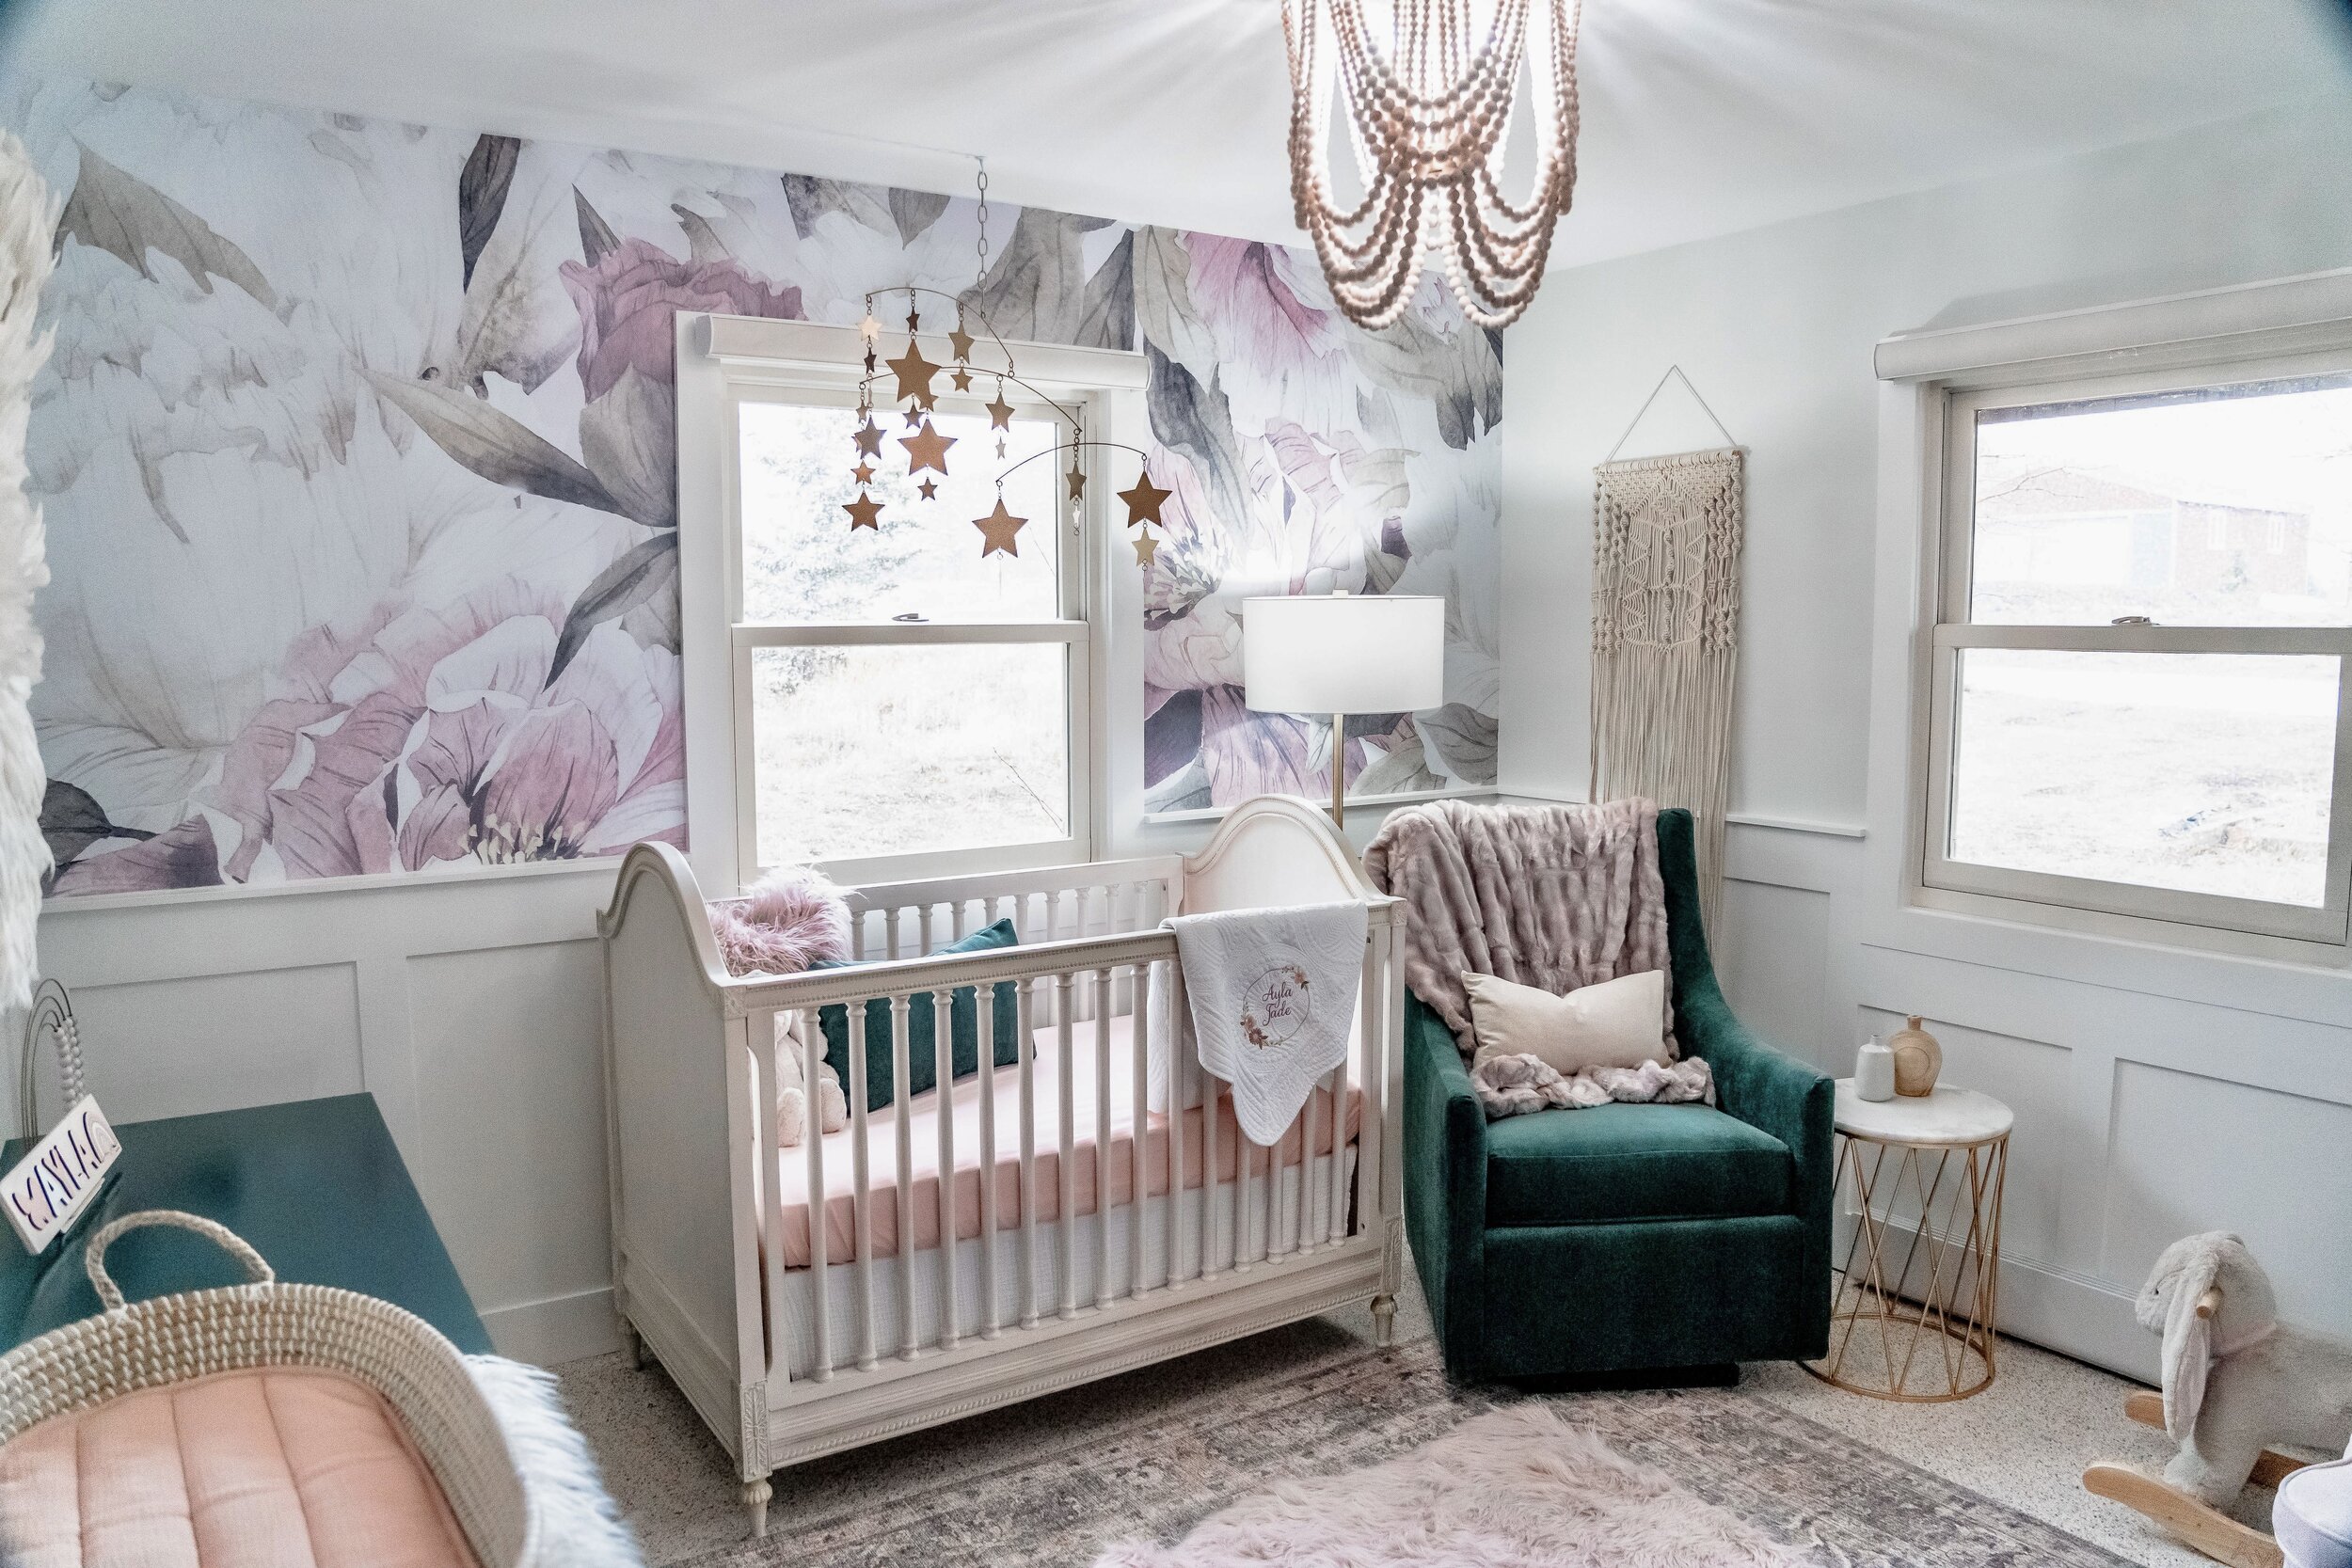
FEATURE WALL AFTER
Once we completed these items we were FINALLY ready to start my favorite part- decorating! I assembled the crib, moved in the chair and canopy and selected a beautiful creamy rug to cover most of the room. I decided to also do a fun custom dresser project like I did for Ayla in this room as well. Instead of going out and finding a dresser to paint, we ended up upgrading our primary bedroom dresser to a solid wood piece and I refinished our old dresser a second time to fit in this space. I painted the shell of the dresser white to match the trim and doors. For a fun ‘pop’ I painted the base trim gold to match the hardware I had selected. Finally, I used a combination of paint and water to create this creamy greige stain on the drawers. I thought the overall look was a fun mix of glam and boho and tied the room together well.

TOP ROW: ORIGINAL DRESSER FROM HABITAT FOR HUMANITY (TOP LEFT IMAGE), DRESSER REFINISHED FOR OUR BEDROOM 4 YEARS AGO (TOP RIGHT IMAGE). BOTTOM ROW: DRESSER PAINTED WHITE FOR CORA (BOTTOM LEFT IMAGE), CUSTOM WATER/PAINT STAIN NEXT TO ORIGINAL FINISH (BOTTOM MIDDLE PICTURE), FINISHED LOOK (BOTTOM RIGHT IMAGE)
There is absolutely no greater joy for me than to see a design vision come to life. This room is so special to me in so many ways and I could not be happier with the end result.


I wanted the artwork in the space to reflect the wallpaper design and give a little nod to our home in the mountains. I selected some beautiful watercolor mountain photos to flank the windows and some greenery prints to go on either side of the dresser. I have found myself being drawn to butterflies in this space so I wanted the statement art piece to be a butterfly. I tried to create one on my own on a canvas but I have to remind myself that I am a designer, not an artist. With my creation being scrapped, I ended up ordering this print and I just hit it with a little bit of the raspberry purple color tones I used in the room to tie it to the rest of the space. I also knew I wanted some floating shelves to display some sentimental pieces. The shelves display a musical carousel horse snow globe that was my sisters growing up and matches one that I have in Ayla’s room. I also selected a custom piece of artwork of the mountains hand-painted by a local artist. Cora’s shelves also have a picture of her big sister and a wooden heart that she painted for her. Finally, I included an adorable name puzzle given to Cora by her great grandmother, Nana, and a castle piggy bank from her other great grandmother, Barb, and her Aunt San.
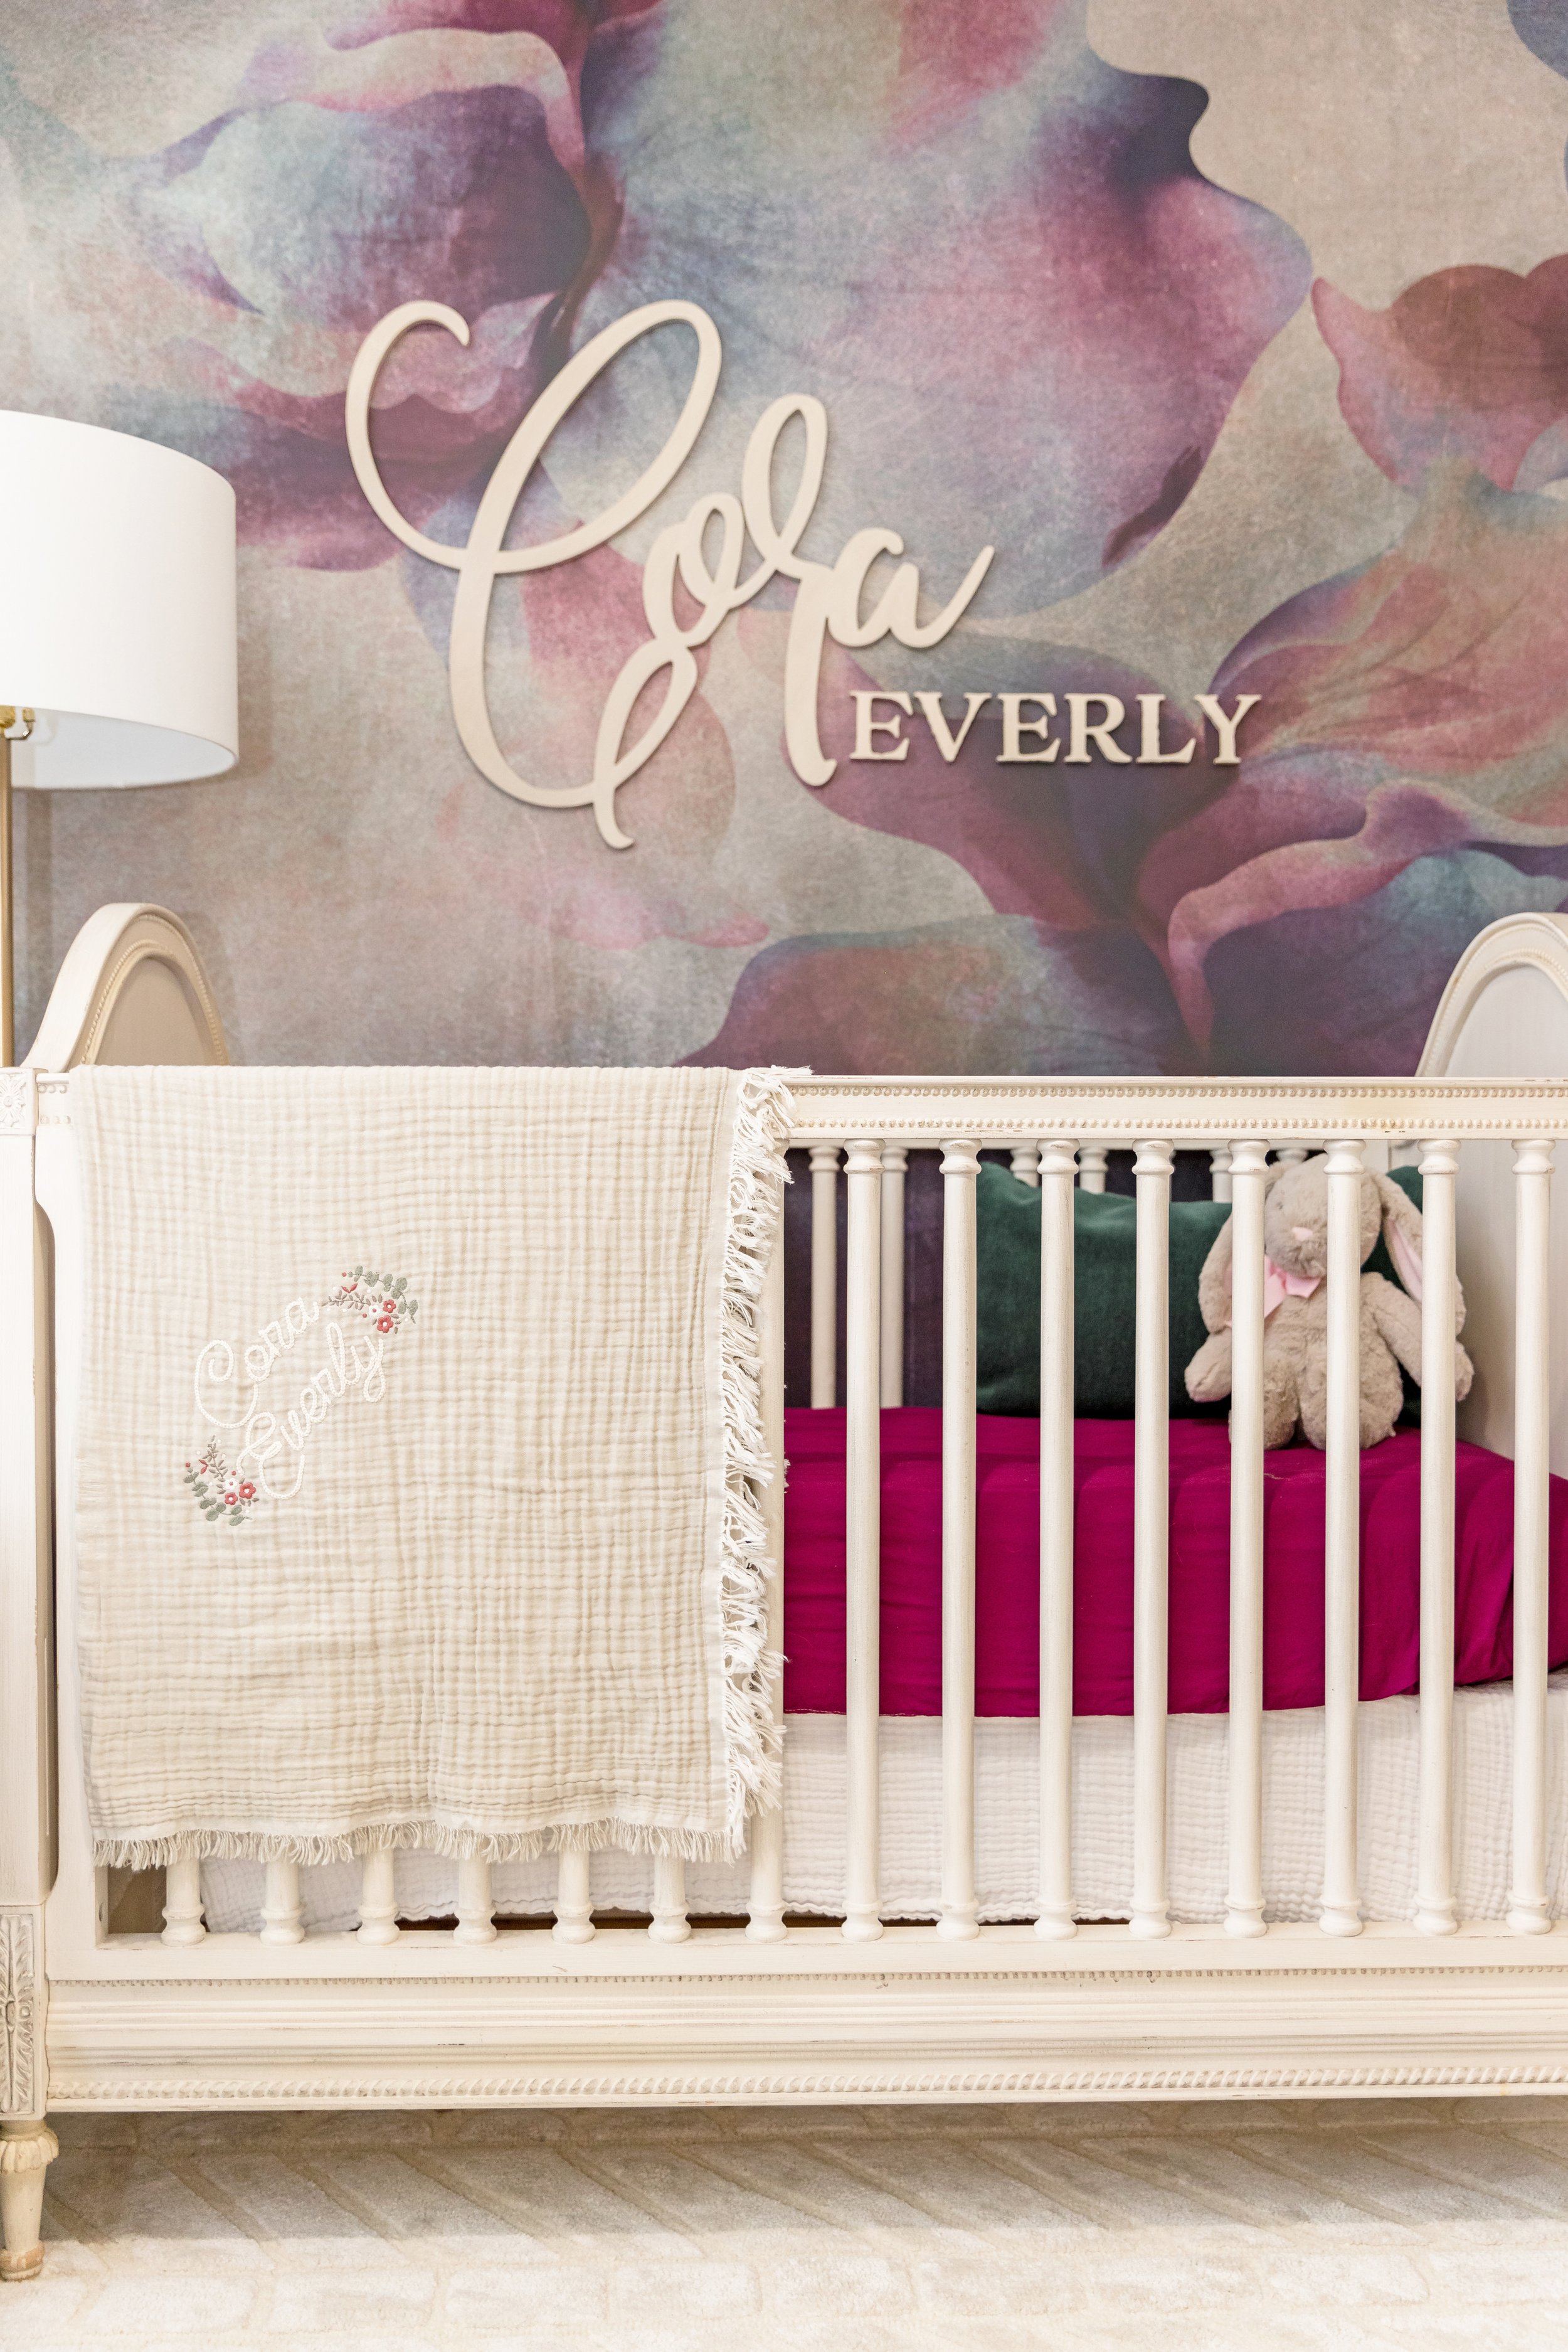
Some of the final details included a gorgeous statement capiz scalloped chandelier, a beautiful rocking unicorn from her grandma, Didi, and a rattan toy box with her name on it from her Grandpa. My all time favorite element of the room is the gorgeous wood letters that display her name so perfectly on her feature wall. This was a special gift from her Aunt Ashley and Uncle Eddie. It was the perfect way to tie in all the wood elements and personalize her space. I love that we can look around the room and have a special way to think about all of the wonderful family and friends that already love this sweet girl so much and know the sentimental value that each item holds.

fLOATING SHELVES

DRESSER/ART DETAIL
CRIB
When it comes to my family, I do everything with love and there is no detail overlooked when it comes to creating the perfect space for them. I had so much fun designing this space for my baby girl and we are so excited to share so many wonderful memories together here. I love sitting in her room and thinking of all of the precious moments she will spend rocking in my arms and all of the special times we have to look forward to as a family. Pregnancy is not an easy journey, but it is so worth it when you get to hold your baby in your arms for the first time.


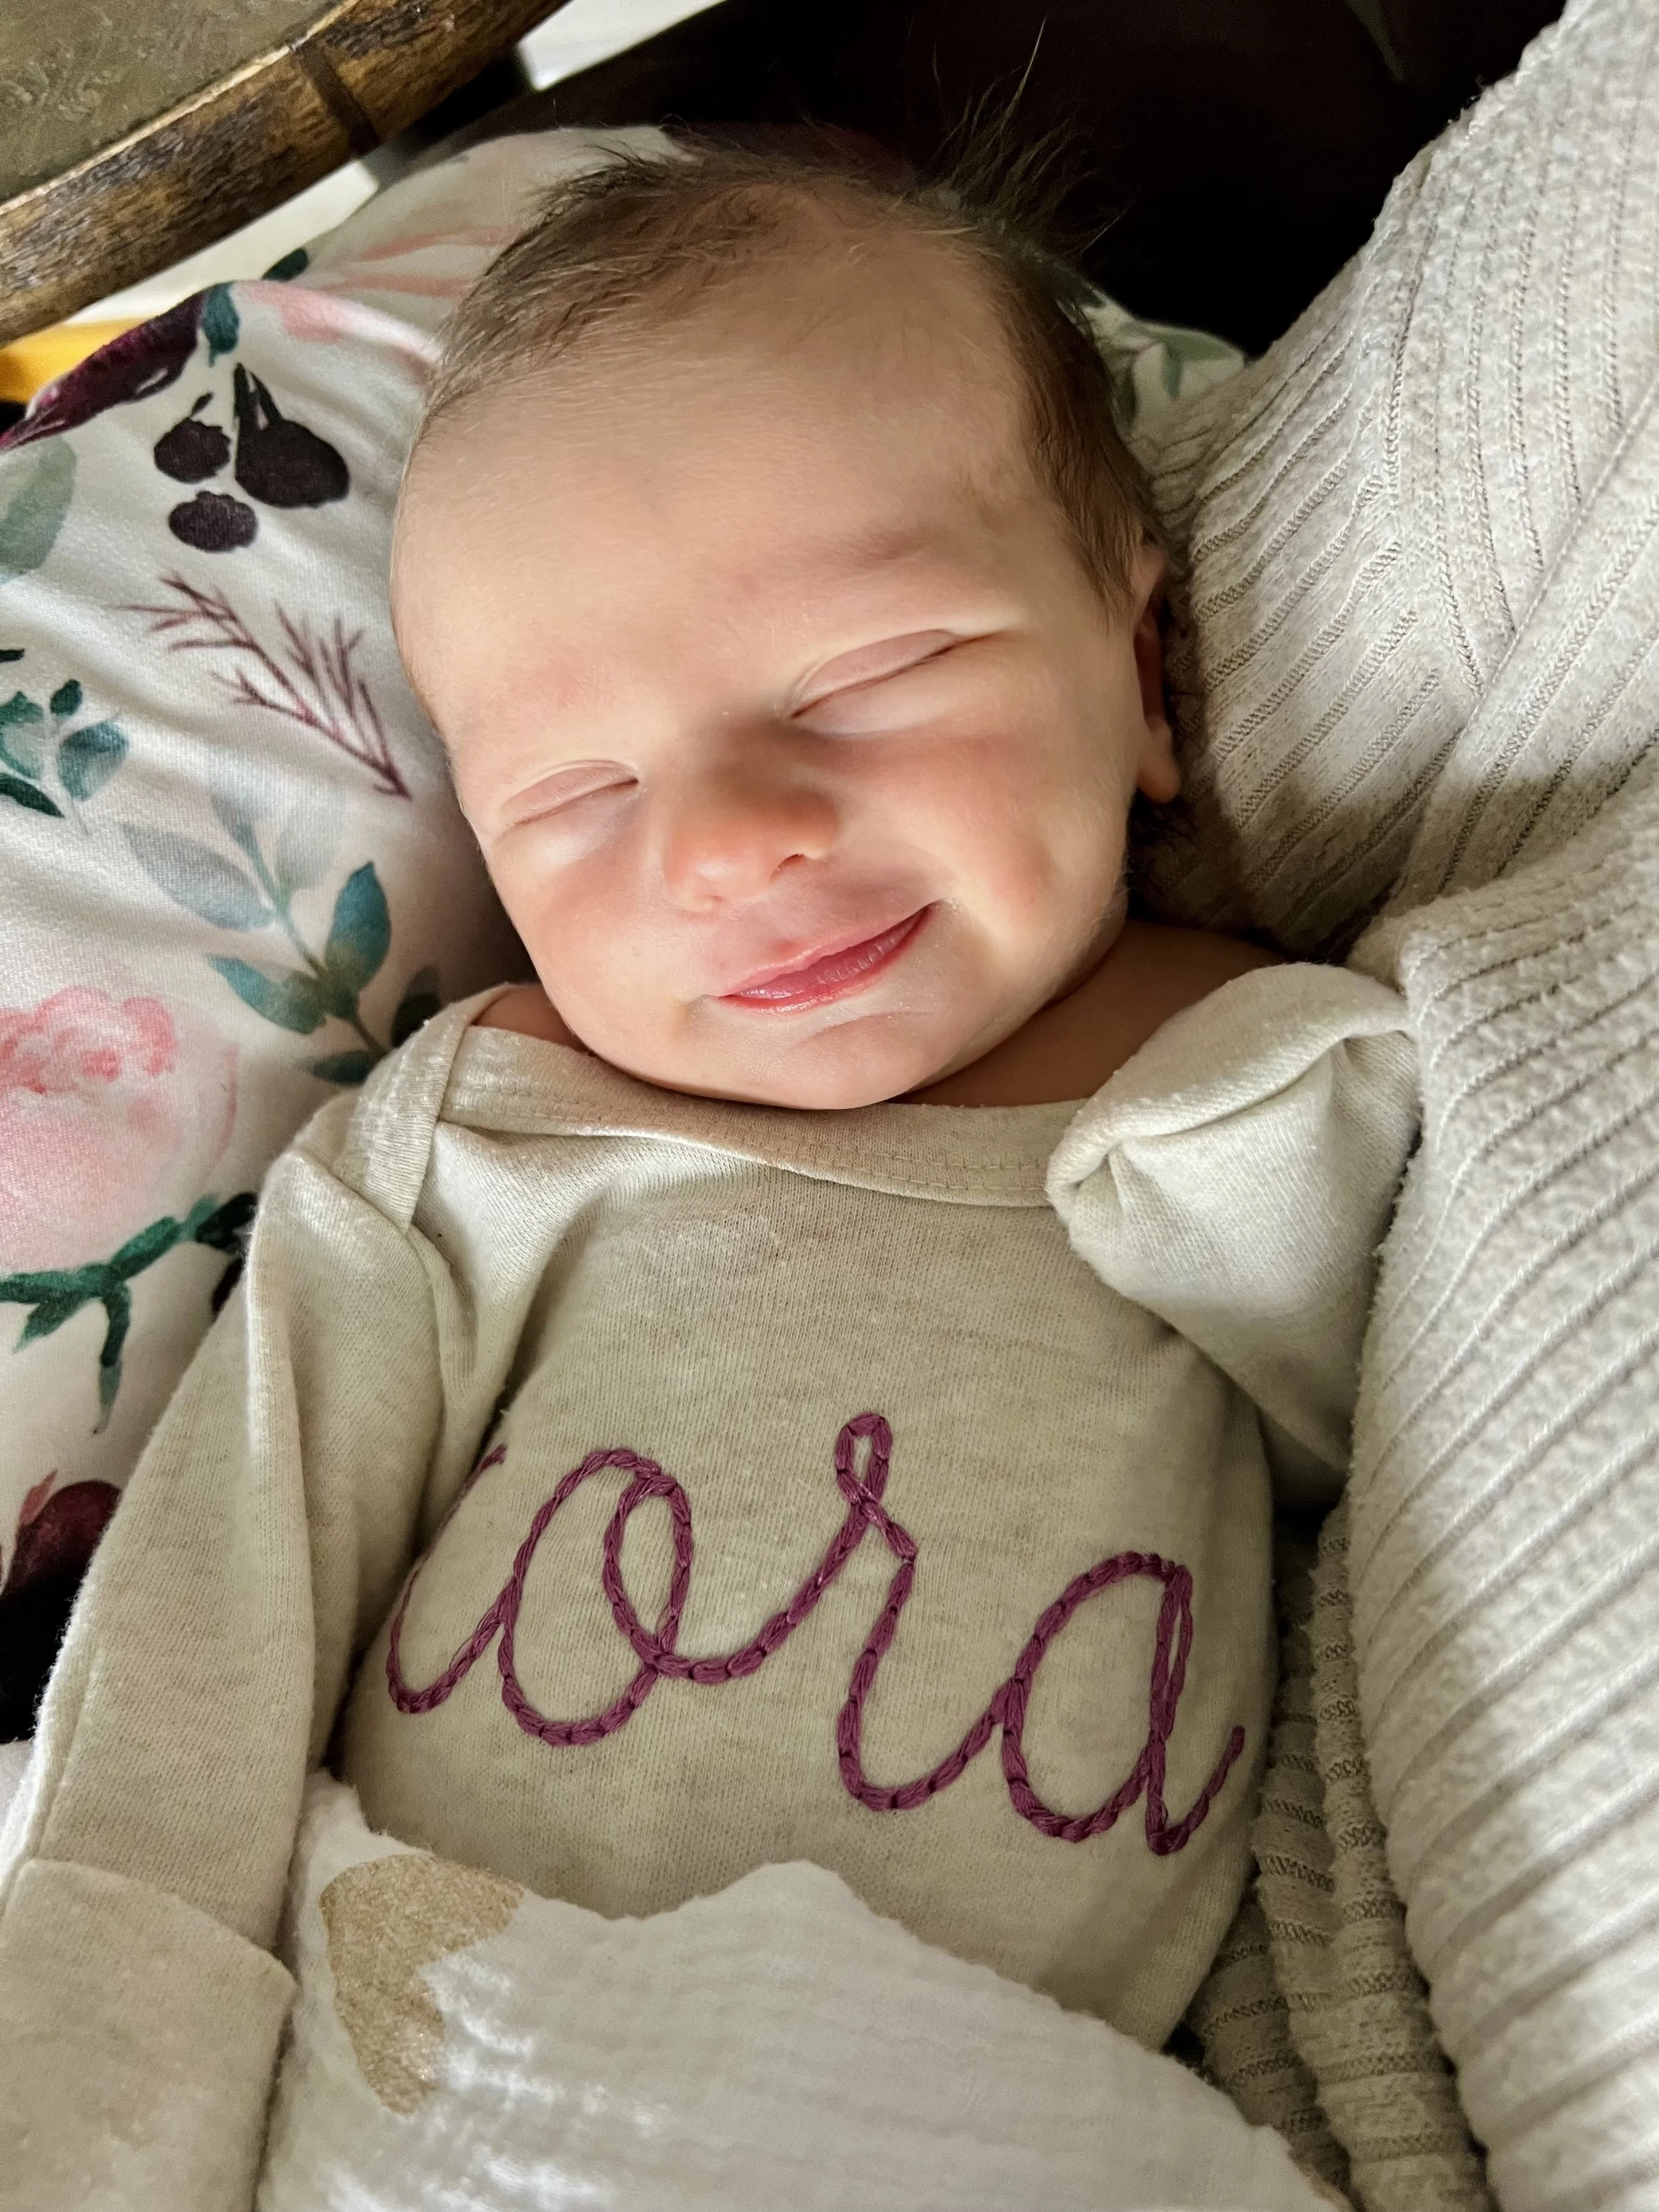
Cora Everly Parr was born on August 1st at 4:38PM weighing 6 pounds 15 ounces and measuring 18.5 inches long. She has beautiful blue eyes and a full head of hair. We are so in love and soaking in every moment as a family of four. Ayla is loving having a real life baby doll and is already stepping up to her duties as big sister. We are truly blessed beyond belief and can’t wait to make so many beautiful memories together.